Step-by-Step Stucco Weep Screed Retrofit During Home Remodels & Hardscaping

Why Home Remodels Trigger the Need for a Stucco Weep Screed Retrofit
If you're investing in a home remodel, you want to protect that investment. If you want to understand how weep screed protects your foundation, it's simple: it gives water trapped behind your stucco a way out. But remodels often disrupt this delicate system.
Free Assessment
Noticing Stucco Damage?
Get a free on-site assessment from a licensed contractor. $0 deposit, no obligation.
GET FREE ASSESSMENTPouring New Concrete Patios and Walkways (The 4-Inch Clearance Rule)
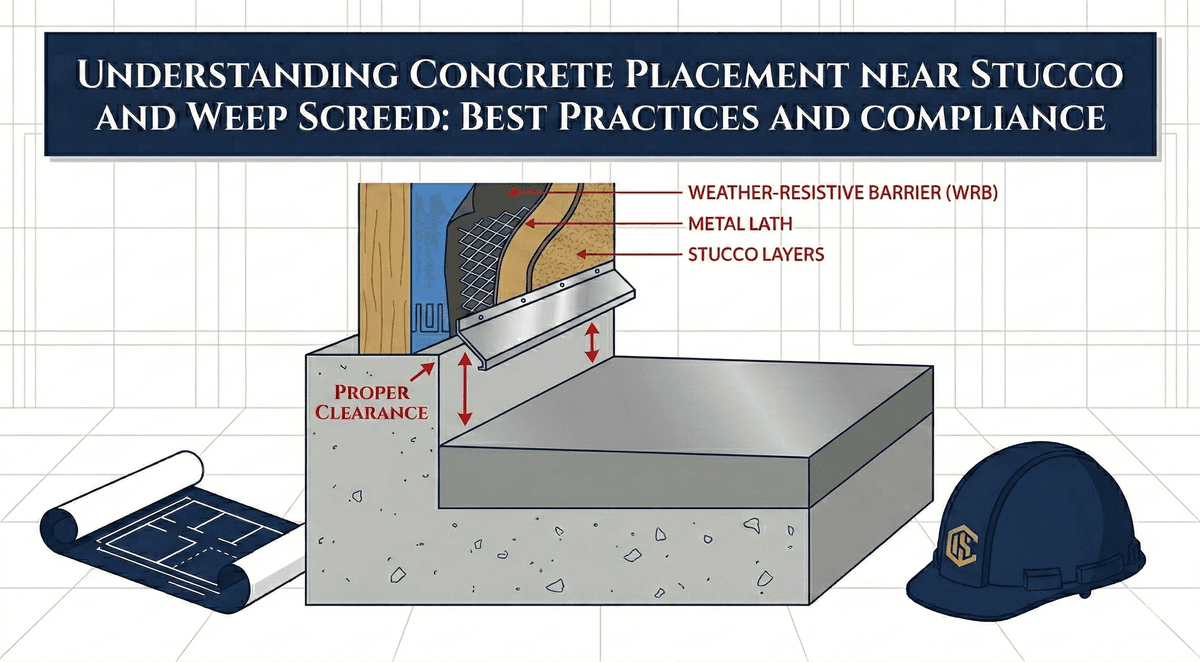
When hardscapers pour new concrete patios or walkways, they often raise the ground level. If the new concrete is poured directly against the stucco or covers the existing weep screed, water will bridge from the patio straight into your wall cavity. To meet local building code clearance requirements, the weep screed must be at least 2 inches above paved surfaces and 4 inches above bare earth.
Adding Decking or Raising Grade Levels Against the Foundation
Building a new wooden or composite deck can also obstruct your home's drainage. Even if the deck boards aren't touching the stucco, the ledger board attachment and the raised grade underneath can compromise the weep screed's ability to shed water.
Room Additions and Tying Old Stucco into New Construction
When adding a room, the new foundation and framing must seamlessly tie into the existing structure. This means the old weep screed must be retrofitted and properly layered with the new weather-resistant barrier (WRB) to ensure a continuous moisture envelope.
Evaluating Your Current Stucco Before the Remodel Begins
Identifying Buried Weep Screeds
Before any demolition or pouring starts, walk the perimeter of your project area. Look for a metal track with small holes at the bottom edge of your stucco. If you don't see one, or if it's already buried under dirt or old concrete, you need a retrofit.
Spotting Hidden Moisture Damage and Wood Rot
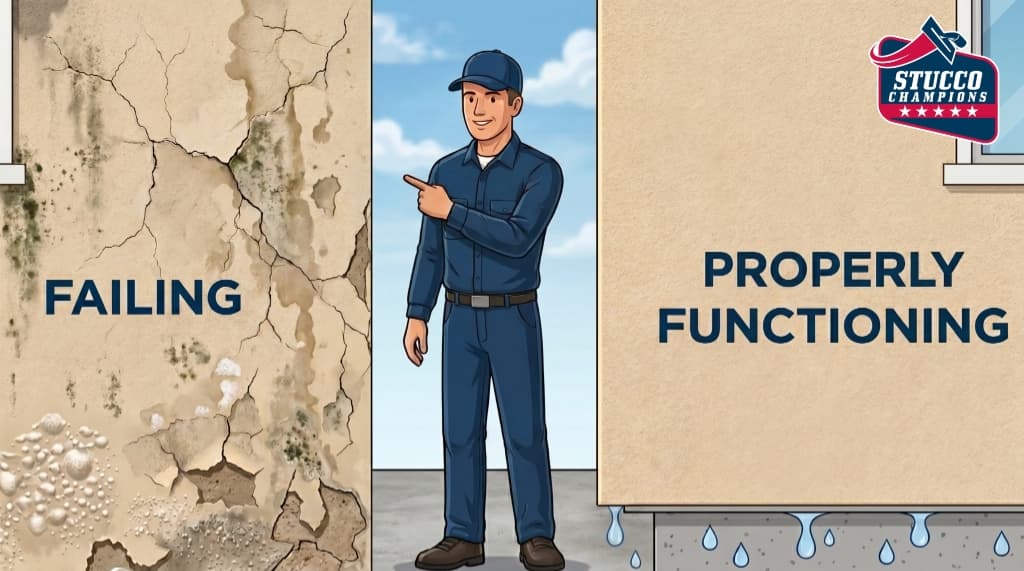
Look for chalky white stains (efflorescence), bubbling paint, or crumbly stucco near the base of the wall. These are signs of trapped water. If you spot these, you will need to repair hidden moisture damage and replace rotted framing before installing the new screed.
The Stucco Weep Screed Retrofit Process: Step-by-Step Integration
A professional retrofit involves careful demolition and rebuilding to restore the moisture barrier.
Step 1: Making the Clean Cut (Creating the Retrofit Gap)
Contractors use a masonry saw to make a clean, horizontal cut through the stucco several inches above the foundation line, exposing the framing and old lath.
Step 2: Removing Damaged Lath and Integrating Weather-Resistant Barriers (WRB)
The old metal lath and degraded building paper are carefully removed. The new WRB must be tucked under the existing intact paper above the cut line (shingle fashion) so water naturally flows downward over the new layers.
Step 3: Installing the Retrofit Screed and Lath Overlap
The new metal weep screed is nailed into the sill plate or foundation at the correct height to clear the new patio or deck. New galvanized metal lath is then attached over the WRB, overlapping the screed's upper flange.
Step 4: Applying the Scratch, Brown, and Finish Coats to Match
The gap is filled with fresh Portland cement (scratch and brown coats). Finally, a color-matched texture coat is applied to seamlessly blend the retrofit with the rest of your home's exterior.
Coordinating the Retrofit with Your Hardscape or Deck Contractor
Who Goes First? Sequencing the Stucco vs. The Concrete/Decking
Communication is key. The stucco contractor should usually perform the demo and establish the new weep screed height before the concrete is poured. Once the patio is cured, the stucco contractor returns to apply the cement coats, using the new patio as a clean stopping point to ensure the exact 2-inch code clearance.
Navigating Permits and Municipal Inspections for the Retrofit
Most major exterior alterations require a permit. Ensure your contractors include the weep screed retrofit in the project scope so the municipal inspector can sign off on the lath and WRB before the final stucco coat goes on.
Why You Should Never Skip the Weep Screed When Upgrading Your Home
Protecting Your Investment from Costly Water Intrusion
Skipping the retrofit to save a few hundred dollars on your new patio can lead to tens of thousands of dollars in structural rot, termite damage, and mold remediation down the road. If you're upgrading your home, do it right.
Expert Weep Screed Retrofitting in Southern California
If you're planning a remodel and need an expert stucco weep screed retrofit, Stucco Champions has you covered. We specialize in seamless retrofits that protect your home and satisfy municipal codes. Contact us today for a consultation before your next hardscaping project begins.
Frequently Asked Questions About Stucco
How much does stucco repair cost in Orange County and Los Angeles?+
Small stucco patches start at $650, larger repairs start at $1,200, and re-stucco of a single elevation up to about 400 sq ft runs about $1,400 - $5,900+. The exact cost depends on the damage type (hairline cracks, water damage, delamination, weep screed failure), the square footage involved, and whether the original three-coat or one-coat stucco system needs to be matched. Stucco Champions provides fixed-price written estimates after a free on-site assessment — no hourly billing, no surprise change orders. See our stucco repair cost guide for detailed pricing by repair type.
How long does stucco last in Southern California?+
Properly installed three-coat stucco lasts 50-80+ years in Southern California's climate. The most common failure points aren't the stucco itself — they're the supporting components: corroded weep screed, deteriorated building paper behind the stucco, and improperly sealed window flashing. Most "stucco failures" are actually moisture-intrusion failures that start at one of these points. Annual visual inspection catches problems before they spread, which is why we offer free weep screed assessments for homeowners in our service area.
Can I repair stucco myself, or do I need a contractor?+
Hairline cracks under 1/8 inch wide can be sealed with elastomeric caulk by a homeowner. Anything larger — pattern cracks, delamination (where stucco pulls away from the wall), water-damaged areas, or chimney/window leak repairs — requires a licensed contractor. Improper DIY repair on these is the #1 cause of repeat failures because the underlying cause (usually moisture) isn't addressed. California's CSLB requires a license for any stucco work over $500. Looking for a highly-rated stucco contractor in Southern California? We are a CSLB-licensed and insured team ready to help.
How do I know if I need stucco repair vs. full re-stucco?+
If less than 30% of an elevation has visible damage, repair is the right call. If you see large areas of cracking, multiple zones of delamination, or the underlying paper and lath have rotted across an entire wall, full re-stucco of that elevation is more cost-effective long-term. Our free assessment includes a moisture survey and lath inspection so you get a defensible recommendation either way — not just a quote pushing whichever option costs more.
Do you offer warranties on stucco work?+
Approved stucco repair work includes a 1-year written workmanship warranty. The applicable terms are documented with the approved scope. Stucco Champions is CSLB licensed and insured; verify license #1122006 through the official state lookup. Request a free estimate to review the scope and warranty terms before you sign.
How long does a stucco repair take?+
Most patch repairs are completed in 1-2 days, including a 24-hour cure time before texture matching and color application. Full re-stucco of a single elevation runs 5-7 working days because each coat (scratch, brown, finish) needs to cure properly before the next is applied. We schedule around weather — California stucco needs daytime temperatures above 50°F with no rain forecast for at least 24 hours after each coat. Our crew shows up on time, every time.
Stucco Diagnostics & Calculators
Diagnose specific wall damage symptoms or estimate job scope with our free guides and calculators.
Related Professional Services
A licensed assessment identifies the cause before the finish is opened or replaced.