Should You Choose Stucco? Pros, Cons, and Anatomy
In Southern California, stucco is more than just a siding option; it is the architectural standard. From the historic Spanish Revivals of Pasadena to the modern coastal homes of Newport Beach, this material has stood the test of time for over a century.
Technically known as Portland Cement Plaster, stucco is a highly durable, fire-resistant cladding system designed to breathe. Unlike vinyl siding or fiber cement board, stucco is not a panel; it is a monolithic, continuous shell created on-site. This guide breaks down the anatomy, application methods, and the pros and cons to help you decide if it is right for your home.
1. The Anatomy of Stucco
Stucco is an engineered, site-mixed combination of four primary ingredients:
- Portland Cement: The chemical binder that provides structural strength (typically Type II/V in SoCal to resist sulfates).
- Sand (Aggregate): Provides bulk and durability. Professionals use washed plaster sand meeting ASTM C144 standards.
- Lime: A natural plasticizer that makes the heavy mix workable and slightly flexible.
- Water: Activates the chemical hydration process, causing the cement to harden.
When applied wet, this mixture hardens into a rock-like surface that is "vapor permeable"—meaning it allows moisture vapor to escape the home cavity while shedding bulk rainwater on the outside.
Free Assessment
Noticing Stucco Damage?
Get a free on-site assessment from a licensed contractor. $0 deposit, no obligation.
GET FREE ASSESSMENT2. Application Methods: 3-Coat vs. 1-Coat
Not all stucco systems are built the same. The method used depends entirely on your structural substrate.
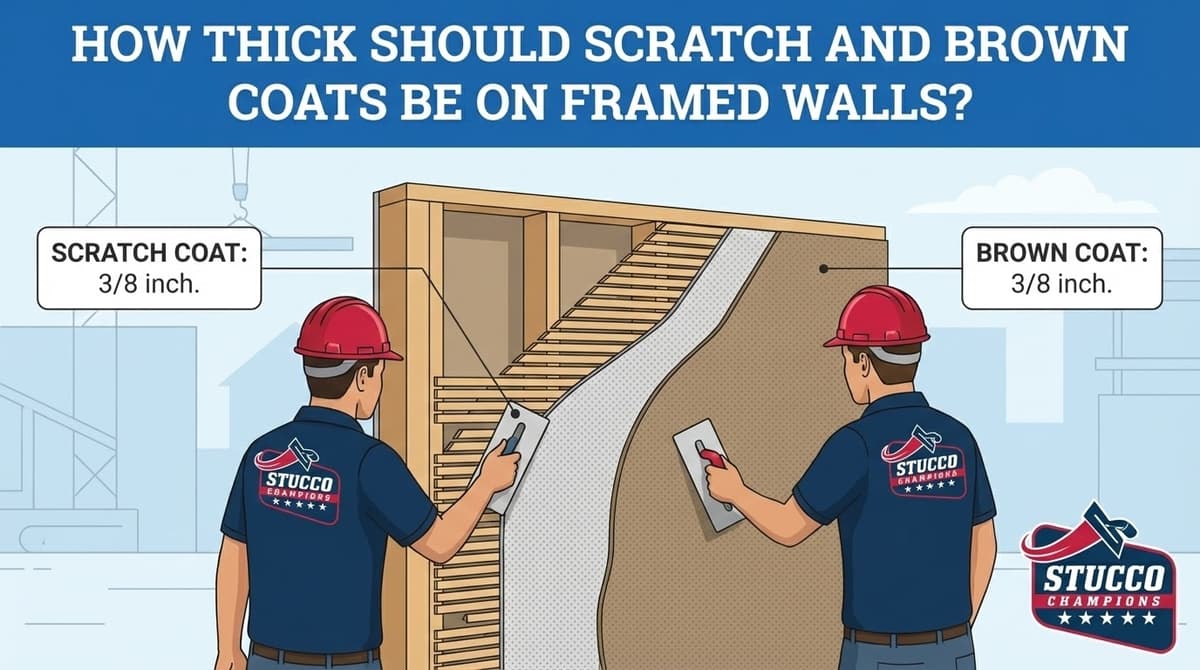
The Traditional Three-Coat System (ASTM C926)
This is the gold standard for wood-framed homes. It builds a massive 7/8-inch thick shell.
- Scratch Coat: Embeds the galvanized wire lath to the wall.
- Brown Coat: Levels the wall perfectly flat.
- Finish Coat: Provides the decorative texture and color.
Why we love it: Superior impact resistance and an incredibly valuable 1-hour fire rating.
The One-Coat System (Foam System)
Despite the confusing name, this is actually two coats of cement applied over rigid foam insulation (EPS).
- Base Coat: A fiber-reinforced layer applied 3/8" to 1/2" thick over the foam and wire.
- Finish Coat: The top texture.
Why use it? Energy efficiency. The heavy foam layer helps meet strict California Title 24 insulation requirements.
The Two-Coat System
Used exclusively for masonry or concrete block walls (CMU). Because the wall is already solid rock, we skip the wire lath and scratch coat, bonding the base leveling coat directly to the masonry.
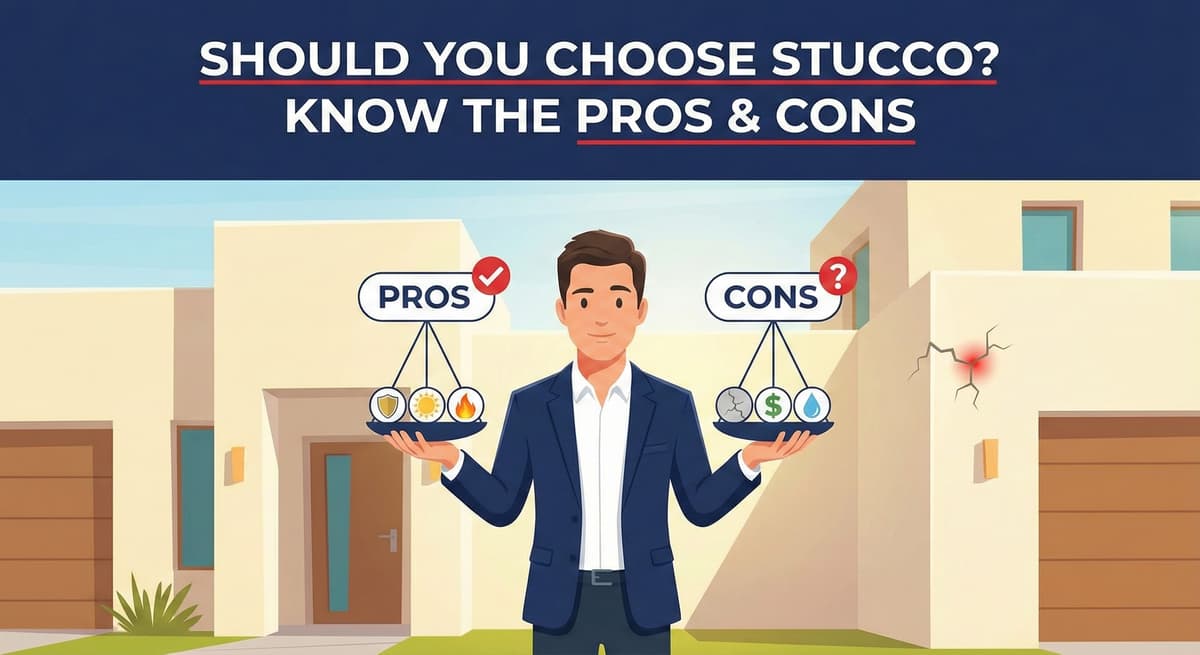
3. Pros and Cons of Stucco
The Advantages
- Fire Resistance: Stucco is completely non-combustible. In Wildland-Urban Interface (WUI) zones, a 3-coat system protects the wood framing from extreme radiant heat.
- Durability: A properly maintained wall can easily last 50-80 years.
- Design Flexibility: It can be molded around arches, curves, and corbels seamlessly, something panel siding cannot do.
The Limitations
- Cracking: Stucco is rigid cement. As the wood framing of the house naturally expands and contracts, hairline cracks are inevitable.
- Porosity: Because cement naturally absorbs water, the waterproofing paper underneath (we mandate Two Layers of Grade D Paper) is the true hero of the wall. If the paper fails, the wall fails.
4. Maintenance Protocols
To get 50 years out of your stucco, follow these strict rules:
- Cleaning: Do not blast the wall with high-pressure power washers, which will etch the cement and destroy the finish. Use a "Soft Wash" approach with a garden hose and mild detergent.
- Crack Repair: Seal cracks immediately using a textured acrylic elastomeric sealant, never silicone. Silicone creates a shiny, permanent scar that paint will not stick to.
- Weep Screeds: Keep landscaping soil and concrete pavers at least 4 inches below the metal weep screed at the foundation line. If you bury the weep screed, water cannot drain out of the wall.
Frequently Asked Questions About Stucco
How much does stucco repair cost in Orange County and Los Angeles?+
Stucco repair typically ranges from $500 for minor crack patching to $5,000+ for full re-stucco of a single elevation. The exact cost depends on the damage type (hairline cracks, water damage, delamination, weep screed failure), the square footage involved, and whether the original three-coat or one-coat stucco system needs to be matched. Stucco Champions provides fixed-price written estimates after a free on-site assessment — no hourly billing, no surprise change orders. See our stucco repair cost guide for detailed pricing by repair type.
How long does stucco last in Southern California?+
Properly installed three-coat stucco lasts 50-80+ years in Southern California's climate. The most common failure points aren't the stucco itself — they're the supporting components: corroded weep screed, deteriorated building paper behind the stucco, and improperly sealed window flashing. Most "stucco failures" are actually moisture-intrusion failures that start at one of these points. Annual visual inspection catches problems before they spread, which is why we offer free weep screed assessments for homeowners in our service area.
Can I repair stucco myself, or do I need a contractor?+
Hairline cracks under 1/8 inch wide can be sealed with elastomeric caulk by a homeowner. Anything larger — pattern cracks, delamination (where stucco pulls away from the wall), water-damaged areas, or chimney/window leak repairs — requires a licensed contractor. Improper DIY repair on these is the #1 cause of repeat failures because the underlying cause (usually moisture) isn't addressed. California's CSLB requires a license for any stucco work over $500. Looking for a highly-rated stucco contractor in Southern California? We are a CSLB-licensed and insured team ready to help.
How do I know if I need stucco repair vs. full re-stucco?+
If less than 30% of an elevation has visible damage, repair is the right call. If you see large areas of cracking, multiple zones of delamination, or the underlying paper and lath have rotted across an entire wall, full re-stucco of that elevation is more cost-effective long-term. Our free assessment includes a moisture survey and lath inspection so you get a defensible recommendation either way — not just a quote pushing whichever option costs more.
Do you offer warranties on stucco work?+
Approved stucco repair work includes a 1-year written workmanship warranty. The applicable terms are documented with the approved scope. Stucco Champions is CSLB licensed and insured; verify license #1122006 through the official state lookup. Request a free estimate to review the scope and warranty terms before you sign.
How long does a stucco repair take?+
Most patch repairs are completed in 1-2 days, including a 24-hour cure time before texture matching and color application. Full re-stucco of a single elevation runs 5-7 working days because each coat (scratch, brown, finish) needs to cure properly before the next is applied. We schedule around weather — California stucco needs daytime temperatures above 50°F with no rain forecast for at least 24 hours after each coat. Our crew shows up on time, every time.
Related Professional Services
A licensed assessment identifies the cause before the finish is opened or replaced.