Retrofit vs. New-Construction Windows: Which Is Right for Your Stucco Home?

Written by Stucco Champions - Southern California's Authority on Exterior Plastering.
If you're replacing windows on a stucco home, the first decision isn't the brand or the glass package — it's the installation method. Retrofit (flush-fin) windows install inside your existing window frame without touching the stucco: faster, and typically 30-50% cheaper per opening, but you keep the old frame and lose about 1-2 inches of glass on each side. New-construction (nail-fin) windows replace the frame entirely, which means cutting back the stucco around every opening and patching it afterward: more expensive up front, but the opening gets properly re-flashed and integrated into the wall's weather barrier.
Our recommendation is new-construction. When it rains, we take at least ten calls a day from homeowners dealing with leaking or failing retrofit windows — water stains under the sill, soft stucco below the opening, rust streaks bleeding through the wall. A retrofit's waterproofing is a bead of caulk on the face of the stucco; a new-construction install rebuilds the flashing and paper behind the stucco the way the wall was designed to work. Here's how the two methods actually compare, what they cost, and what a correct install looks like.
The Two Installation Methods, Defined
Retrofit windows (also called flush-fin, Z-bar, or insert windows) are built to slide into your existing window frame after the old sashes and hardware are removed. A flat exterior fin overlaps the face of the stucco around the opening and gets sealed to it with sealant. The old frame — usually the original aluminum on 1960s-1990s Southern California homes — stays in the wall permanently, hidden inside the new unit.
New-construction windows (nail-fin or flanged windows) are the type used when a house is first built. A perimeter fin nails flat against the wall sheathing and gets integrated into the home's water-resistive barrier with flashing tape and building paper. Installing one in an existing stucco home means removing the old window and its frame down to the rough opening — which requires cutting back the stucco around the opening to expose the sheathing.
The names cause confusion: "new-construction" windows are routinely installed in existing homes. The name refers to the fin style, not the age of the house.
Free Assessment
Noticing Stucco Damage?
Get a free on-site assessment from a licensed contractor. $0 deposit, no obligation.
GET FREE ASSESSMENTHow Each One Goes Into a Stucco Wall
Retrofit install (no stucco work)
- Old sashes, hardware, and fixed glass come out; the original frame stays.
- The new unit slides into the old frame from outside.
- The flush fin lands on the face of the stucco and is fastened through the old frame.
- The fin-to-stucco joint is sealed with a bead of sealant. That bead is the only thing keeping water out of the joint.
- Interior gets trimmed or caulked. Done in 1-2 hours per window.
New-construction install (stucco cut-back required)
- Stucco is saw-cut and chipped back roughly 2-4 inches around the entire opening, exposing the sheathing and the edge of the existing building paper.
- The old window and frame come out completely, down to the rough opening.
- The opening is re-flashed: sill pan or sill flashing tape first, then the window set and nailed through the fin, then jamb and head flashing lapped shingle-style so every layer sheds water onto the one below it.
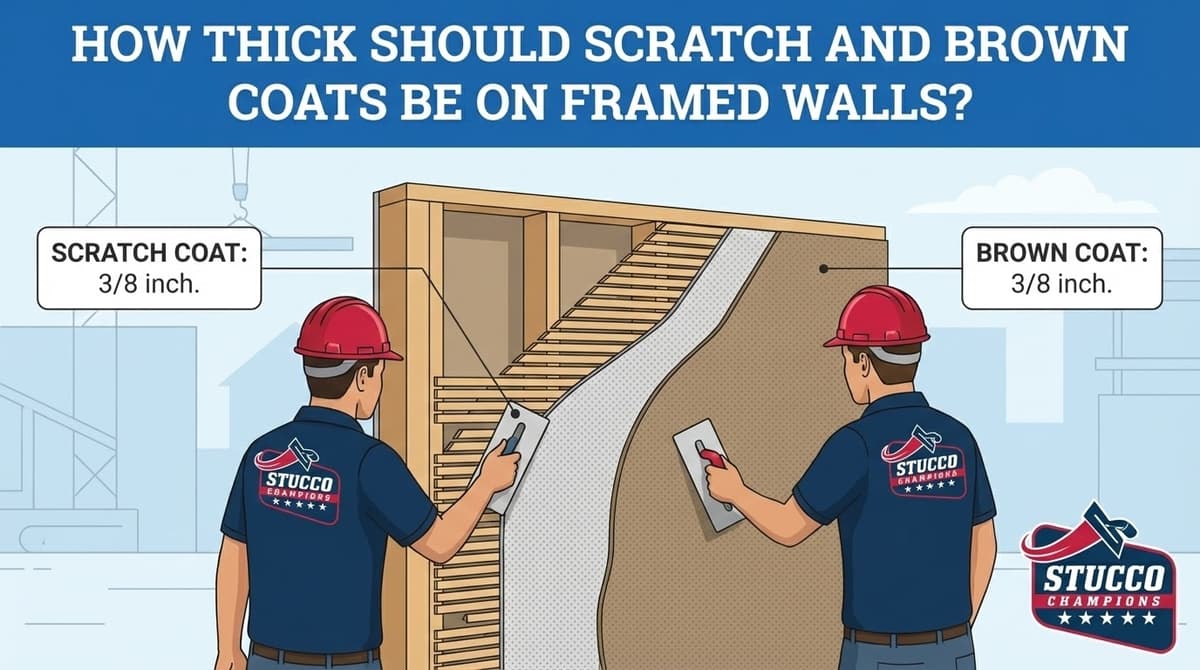
- New building paper laps into the existing paper around the opening, new lath is tied in, and the stucco is patched back in three coats — scratch, brown, and a finish coat textured to match the surrounding wall.
- The window itself is set in a day; the stucco patch-back adds several visits over the following days as each coat cures.
Why We Recommend New-Construction
We're a stucco company, not a window dealer — we don't earn anything selling you one window type over the other. What we do have is a front-row seat to how each method ages, and it's not close. Every time it rains, our office takes at least ten calls a day from homeowners with retrofit windows that are leaking, staining the wall below, or hiding damage that's been spreading for years.
The pattern is almost always the same:
- The caulk joint is the whole defense. A retrofit's waterproofing is a surface bead of sealant between the fin and the stucco face. UV, heat cycling, and building movement open that bead — and once it opens, water runs straight down behind the old frame.
- The old frame's problems come along for the ride. If the original opening had failed paper or flashing (very common on 1960s-1990s tract homes), the retrofit seals the evidence inside the wall. The homeowner doesn't see it again until stucco starts staining, bubbling, or going soft.
- By the time it's visible, it's a wall repair, not a window repair. Rusted lath, rotted sheathing, and damaged framing around the opening cost far more to fix than the money saved choosing retrofit — and the right fix at that point is pulling the retrofit and doing the new-construction install anyway, plus the damage.
A new-construction install costs more on day one because the stucco has to be opened and patched back. But that's exactly why it works: the flashing and building paper get rebuilt behind the stucco, shingle-lapped so gravity sheds water out of the wall instead of into it. Done right, the opening is waterproofed by the wall system itself — not by a bead of caulk that needs to be perfect forever.
Cost Comparison on a Stucco Home
Southern California ballparks for a standard-size vinyl window, installed:
- Retrofit: roughly $450-$1,000 per opening depending on size and glass package. No stucco line item.
- New-construction: roughly $1,200-$2,500+ per opening. The window itself costs about the same as a retrofit unit — the difference is demolition, flashing work, and the stucco patch-back, which typically runs $500-$1,500 per window depending on access and texture.
Two things move these numbers more than anything else: how many windows share a wall plane (patching five openings on one elevation is far more efficient than five scattered singles, and sometimes it's smarter to refinish the whole wall than blend five patches), and texture — a heavy Spanish lace patch blends far more forgivingly than smooth stucco, which often needs the entire wall skimmed to look right.
The number that doesn't show up on either bid: what a failed retrofit costs later. A leak that runs behind an old aluminum frame for a few winters routinely turns into a $3,000-$10,000+ repair — water-damaged stucco, rusted lath, rotted sheathing — on top of redoing the window correctly.
When a Retrofit Can Still Make Sense
To be fair, retrofit isn't automatically wrong. It can be a reasonable choice when all of these are true:
- The existing frames are sound, square, and bone dry — no rot, no rust bleeding from the corners, no water stains on the drywall below the sill, no soft or stained stucco anywhere near the openings.
- You're upgrading for energy, noise, or looks, not fixing a leak.
- You accept the maintenance contract that comes with it: the exterior sealant bead must be inspected and re-sealed every 5-10 years, because it's the only waterproofing the opening has.
- Budget or timeline genuinely rules out opening the stucco.
If there's any doubt about what's behind the old frame, spend the money to find out before covering it up — a moisture inspection costs nothing compared to sealing a leak into the wall.
When New-Construction Is the Only Right Answer
- The window or the wall below it leaks. Stains under the sill, bubbling paint, soft drywall, or efflorescence and rust streaks on the stucco below a window mean the flashing or paper has failed. A retrofit caulked over that opening seals the symptom in and lets the framing keep rotting. Start with a stucco water damage assessment.
- The frame is damaged — corroded aluminum, rotted wood, racked out of square from settling.
- You're changing the opening — bigger window, different shape, window-to-door conversion.
- The stucco around the opening already needs repair. If cracking or delamination around the window means the wall is getting opened anyway, do the flashing right while it's exposed.
- A previous retrofit failed. Stacking a second retrofit inside a failed one compounds the glass loss and buries the leak deeper. This is a large share of those rainy-day calls.
The Stucco Cut-Back and Patch: What a Proper Job Looks Like
The window is only half of a new-construction install on a stucco home — the other half is how the wall gets closed back up. A correct patch-back has:
- Clean saw-cut lines 2-4 inches back from the opening, not chipped ragged edges.
- Shingle-lapped flashing — sill pan first, jambs over the sill, head flashing over the jambs, and the new building paper lapped behind the existing paper above the window and over it below, so gravity always sheds water outward.
- Two layers of Grade D paper tied into the existing weather barrier, then new galvanized lath fastened and tied to the old.
- Three coats — scratch, brown, finish — not a single slop coat of patching compound troweled flush.
- Texture matched to the wall and feathered past the patch line so the repair disappears after paint. (See our guide on matching California stucco textures.)
The most common failure we see is a window crew that does beautiful window work and then treats the stucco as an afterthought: one-coat patches with no paper integration, caulked seams instead of lapped flashing, and a texture that doesn't match. The wall leaks at the patch line a few winters later, and the "window leak" was never the window.
Red Flags on a Window Replacement Bid
- A retrofit quoted on an opening with visible water damage — staining, soft stucco, rust streaks below the sill. That's sealing a leak into the wall.
- A new-construction bid with no line item for flashing or paper integration — "we foam it and caulk it" is not a water management plan.
- "Stucco patch included" with no mention of texture matching or number of coats. Ask who is actually doing the plaster work and what their patch process is.
- Big cash deposits before any work. California limits home-improvement deposits to $1,000 or 10%, whichever is less.
- No CSLB license number on the bid — window replacement plus stucco work requires licensed trades.
Energy Codes and Resale
Both retrofit and new-construction replacement windows in California must meet Title 24 energy requirements — currently a maximum U-factor of 0.30 and SHGC of 0.23 for most residential replacements. The window type doesn't change the energy math; the glass package does. Dual-pane low-E glass is the floor for either option.
For resale, buyers and inspectors don't care whether windows are retrofit or new-construction — they care whether the openings are dry. Evidence of moisture around openings is what kills deals in escrow, and that's the failure mode retrofits are prone to. Openings that were re-flashed with a new-construction install and patched to code read clean in an inspection.
Frequently Asked Questions
Can you install a new-construction window without removing stucco?
Not properly. The nail fin has to land on the sheathing and integrate with the building paper, which means the stucco covering that zone has to come off. Some installers trim the fin off a new-construction window and set it like a block-frame insert to avoid stucco work — but at that point you've paid for a new-construction window and gotten a retrofit's waterproofing. The stucco cut-back isn't a defect of the method; it's the entire reason the method works.
Do retrofit windows leak?
Often enough that fixing the aftermath is a meaningful part of our repair work — at least ten calls a day whenever it rains. The failure isn't usually the window itself; it's the concept: the only waterproofing is a surface bead of sealant, and it's frequently installed over an old frame whose flashing had already failed. If you have retrofit windows now, inspect the perimeter sealant annually, re-seal every 5-10 years, and treat any staining or soft stucco below a window as urgent.
How much stucco has to be removed for a new-construction window?
Typically a band 2-4 inches wide around the entire opening — enough to expose the sheathing, remove the old fin, and lap new flashing and paper into the existing weather barrier. It's a controlled saw-cut, not tearing off the wall. Each opening then gets a three-coat patch back to the cut line.
Who repairs the stucco after window replacement — the window company?
Sometimes, but stucco patch-back is plaster work, not window work, and it's where most window projects fall short. Many window companies sub it out or leave it to the homeowner. Ask any window bid exactly who does the patch, whether it's a three-coat patch with paper and lath integration, and how they'll match your texture. We regularly do the cut-back and patch-back around window crews' installs — and repair patches that were done wrong the first time.
How long does the stucco patch take after windows go in?
The scratch and brown coats need cure time before the finish coat, so a proper patch is typically 2-4 short visits spread over several days to a week, plus paint after the finish coat cures. Anyone offering a same-day "one coat and done" patch is skipping the coats that give the patch strength and a flat, blendable surface.
Will the stucco patch match my existing texture?
It should — texture matching is a craft skill, and heavier textures (Spanish lace, dash, sand) blend more forgivingly than smooth troweled finishes. On smooth stucco, an honest contractor will tell you the wall may need to be skimmed corner-to-corner for an invisible result. Always look at photos of a contractor's previous patch blends before hiring, and paint the full wall plane rather than spot-painting the patch.
Planning a window replacement and want the stucco side engineered right — or already staring at a stained wall under a retrofit? Book a free on-site assessment with a CSLB-licensed contractor, or call for a fixed-price quote with $0 deposit.
Frequently Asked Questions About Stucco
How much does stucco repair cost in Orange County and Los Angeles?+
Stucco repair typically ranges from $500 for minor crack patching to $5,000+ for full re-stucco of a single elevation. The exact cost depends on the damage type (hairline cracks, water damage, delamination, weep screed failure), the square footage involved, and whether the original three-coat or one-coat stucco system needs to be matched. Stucco Champions provides fixed-price written estimates after a free on-site assessment — no hourly billing, no surprise change orders. See our stucco repair cost guide for detailed pricing by repair type.
How long does stucco last in Southern California?+
Properly installed three-coat stucco lasts 50-80+ years in Southern California's climate. The most common failure points aren't the stucco itself — they're the supporting components: corroded weep screed, deteriorated building paper behind the stucco, and improperly sealed window flashing. Most "stucco failures" are actually moisture-intrusion failures that start at one of these points. Annual visual inspection catches problems before they spread, which is why we offer free weep screed assessments for homeowners in our service area.
Can I repair stucco myself, or do I need a contractor?+
Hairline cracks under 1/8 inch wide can be sealed with elastomeric caulk by a homeowner. Anything larger — pattern cracks, delamination (where stucco pulls away from the wall), water-damaged areas, or chimney/window leak repairs — requires a licensed contractor. Improper DIY repair on these is the #1 cause of repeat failures because the underlying cause (usually moisture) isn't addressed. California's CSLB requires a license for any stucco work over $500. Looking for a highly-rated stucco contractor in Southern California? We are a CSLB-licensed and insured team ready to help.
How do I know if I need stucco repair vs. full re-stucco?+
If less than 30% of an elevation has visible damage, repair is the right call. If you see large areas of cracking, multiple zones of delamination, or the underlying paper and lath have rotted across an entire wall, full re-stucco of that elevation is more cost-effective long-term. Our free assessment includes a moisture survey and lath inspection so you get a defensible recommendation either way — not just a quote pushing whichever option costs more.
Do you offer warranties on stucco work?+
Yes. Stucco Champions provides a written 5-year workmanship warranty on all stucco repairs and a 10-year warranty on full re-stucco. We're a CSLB-licensed and insured contractor (license #1122006 — verifiable at cslb.ca.gov), which means our work is backed by California's contractor licensing board, not just our own promise. Request a free estimate to see the warranty terms in writing before you sign anything.
How long does a stucco repair take?+
Most patch repairs are completed in 1-2 days, including a 24-hour cure time before texture matching and color application. Full re-stucco of a single elevation runs 5-7 working days because each coat (scratch, brown, finish) needs to cure properly before the next is applied. We schedule around weather — California stucco needs daytime temperatures above 50°F with no rain forecast for at least 24 hours after each coat. Our crew shows up on time, every time.