Stucco Scratch Coat Trowel Guide: Choosing the Right Steel
In the trade of exterior plastering, the trowel is not just a tool; it is a physical extension of the artisan's hand. If you are learning how to plaster, the first and most important tool you need is a dedicated stucco scratch coat trowel.
Using a flimsy, cheap finishing trowel to apply heavy base coats will destroy the tool and leave you with an uneven, weak wall. The texture, smoothness, and structural density of your stucco are determined entirely by the geometry and metallurgy of the steel you use.
This guide explains exactly how to select a professional stucco scratch coat trowel for heavy base coats, and when to switch to specialized stainless steel tools for delicate color finishes.
1. Metallurgy: Why Your Stucco Scratch Coat Trowel Must Be Carbon Steel
Trowels are forged from completely different metals, and each reacts differently to the heavy, abrasive chemistry of Portland cement and sharp sand.
Free Assessment
Noticing Stucco Damage?
Get a free on-site assessment from a licensed contractor. $0 deposit, no obligation.
GET FREE ASSESSMENTHigh Carbon Steel (The Heavy Lifter)
A true stucco scratch coat trowel is always forged from high carbon steel.
- Best For: Applying heavy base coats (the Scratch Coat and the Brown Coat).
- Why? The "scratch coat" uses extremely coarse, sharp sand aggregate. A high carbon stucco scratch coat trowel is incredibly rigid and thick. It can handle the immense abrasion of dragging heavy cement across metal wire lath without bending or warping.
- The Drawback: Carbon steel rusts easily. However, because the scratch coat gets completely buried by the subsequent brown and finish coats, a few minor rust spots left by a carbon steel trowel do not matter.
Stainless Steel (The Finisher)
You should never use a stainless steel blade as a stucco scratch coat trowel. They are too thin, too expensive, and will bend under the weight of heavy base coats.
- Best For: White or light-colored acrylic finish coats.
- Why? Stainless steel does not rust. If you use a carbon steel trowel on a brilliant white "Santa Barbara" finish, microscopic rust particles will embed in the wet cement, leaving orange rust streaks months later.
2. Blade Shapes: The Square Stucco Scratch Coat Trowel
The shape of the trowel blade dictates how the heavy cement mud is manipulated against the wall.
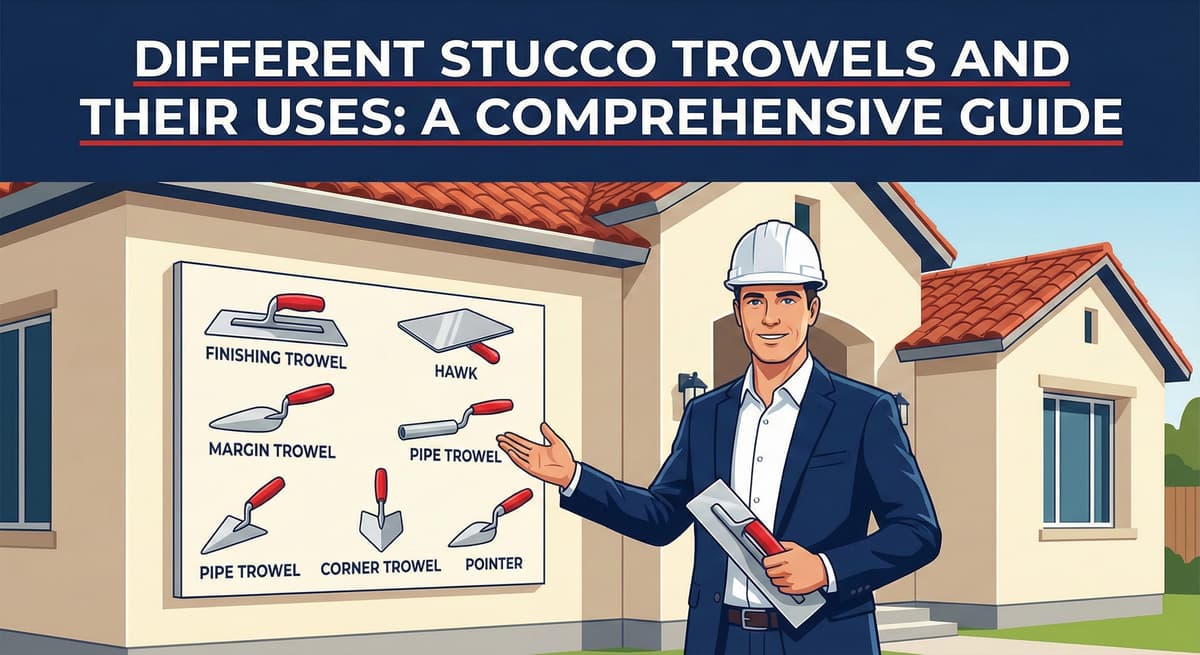
The Square Trowel (Pipe Trowel)
The undisputed shape for a stucco scratch coat trowel is a perfect rectangle with sharp, 90-degree corners.
- Use: Applying heavy base coats, forcing wet cement deep through wire lath, laying material into sharp 90-degree corners, and "rodding" small areas perfectly flat.
- Why it works for base coats: The sharp corners allow the plasterer to push the mud aggressively into tight spaces and scrape excess material off the wall to create a flat plane.
The Pool Trowel (Rounded)
A pool trowel has rounded, curved ends (like an elongated pill shape). You would never use this as a stucco scratch coat trowel.
- Use: Delicate finish coats and highly polished smooth textures.
- Why We Love It: The rounded ends prevent the sharp corners of the tool from "digging in" to the wet finish. This allows the plasterer to make wide, sweeping arcs without leaving "lap marks" or gouge lines in the final texture.
3. Detail Tools for the Scratch Coat
You cannot effectively scratch-coat a complex house with just a massive 14-inch flat trowel. You need smaller tools to support your main stucco scratch coat trowel.
- Margin Trowel: The small, rectangular "bucket scoop." This is essential for mixing small batches in a bucket, cleaning your hawk, and forcing scratch coat mud tightly around pipes and window flanges.
- Pointing Trowel: A small triangular shape. Used for detailed repair work and packing base coat mud into sharp, tight internal angles where a large stucco scratch coat trowel cannot fit.
4. The Pro Tip: Breaking in a New Trowel
A brand new stucco scratch coat trowel is actually dangerously sharp right out of the box. The razor-sharp factory edges can easily slice completely through the black waterproof building paper behind your wire lath.
Before using a brand new trowel on a wall, take a piece of rough concrete block or heavy emery cloth and physically grind down the sharp edges of the steel. Dull the "factory edge" slightly so that it glides over the wire lath rather than cutting into the wall assembly.
Frequently Asked Questions About Stucco
How much does stucco repair cost in Orange County and Los Angeles?+
Stucco repair typically ranges from $500 for minor crack patching to $5,000+ for full re-stucco of a single elevation. The exact cost depends on the damage type (hairline cracks, water damage, delamination, weep screed failure), the square footage involved, and whether the original three-coat or one-coat stucco system needs to be matched. Stucco Champions provides fixed-price written estimates after a free on-site assessment — no hourly billing, no surprise change orders. See our stucco repair cost guide for detailed pricing by repair type.
How long does stucco last in Southern California?+
Properly installed three-coat stucco lasts 50-80+ years in Southern California's climate. The most common failure points aren't the stucco itself — they're the supporting components: corroded weep screed, deteriorated building paper behind the stucco, and improperly sealed window flashing. Most "stucco failures" are actually moisture-intrusion failures that start at one of these points. Annual visual inspection catches problems before they spread, which is why we offer free weep screed assessments for homeowners in our service area.
Can I repair stucco myself, or do I need a contractor?+
Hairline cracks under 1/8 inch wide can be sealed with elastomeric caulk by a homeowner. Anything larger — pattern cracks, delamination (where stucco pulls away from the wall), water-damaged areas, or chimney/window leak repairs — requires a licensed contractor. Improper DIY repair on these is the #1 cause of repeat failures because the underlying cause (usually moisture) isn't addressed. California's CSLB requires a license for any stucco work over $500. Looking for a highly-rated stucco contractor in Southern California? We are a CSLB-licensed and insured team ready to help.
How do I know if I need stucco repair vs. full re-stucco?+
If less than 30% of an elevation has visible damage, repair is the right call. If you see large areas of cracking, multiple zones of delamination, or the underlying paper and lath have rotted across an entire wall, full re-stucco of that elevation is more cost-effective long-term. Our free assessment includes a moisture survey and lath inspection so you get a defensible recommendation either way — not just a quote pushing whichever option costs more.
Do you offer warranties on stucco work?+
Approved stucco repair work includes a 1-year written workmanship warranty. The applicable terms are documented with the approved scope. Stucco Champions is CSLB licensed and insured; verify license #1122006 through the official state lookup. Request a free estimate to review the scope and warranty terms before you sign.
How long does a stucco repair take?+
Most patch repairs are completed in 1-2 days, including a 24-hour cure time before texture matching and color application. Full re-stucco of a single elevation runs 5-7 working days because each coat (scratch, brown, finish) needs to cure properly before the next is applied. We schedule around weather — California stucco needs daytime temperatures above 50°F with no rain forecast for at least 24 hours after each coat. Our crew shows up on time, every time.
Stucco Diagnostics & Calculators
Diagnose specific wall damage symptoms or estimate job scope with our free guides and calculators.
Related Professional Services
A licensed assessment identifies the cause before the finish is opened or replaced.