Winter-Proof Your Home with Durable Stucco Solutions
Written by Stucco Champions — Southern California’s Authority on Exterior Plastering.
In Southern California, "winter" does not bring heavy snow, but it does bring atmospheric rivers, rapid temperature swings, and salt-laden coastal fog. These seasonal weather changes are the primary enemy of your home's exterior envelope. If your stucco has open hairline cracks, degraded sealant joints, or blocked weep holes, water will penetrate the surface during heavy rains. This leads to hidden wood framing rot, degraded insulation, and toxic indoor mold growth.
Winter-proofing is not merely a cosmetic enhancement; it is critical structural maintenance. This guide outlines the technical steps required to inspect, repair, and secure your stucco envelope before the rainy season peaks.
1. The Winter Inspection Protocol
Water is opportunistic. It follows gravity and enters through the path of least resistance. Walk the perimeter of your home and inspect these high-risk areas:
- Re-Entrant Cracks: Diagonal cracks radiating outward from the corners of windows and doors. These develop from structural stress and are prime locations for rainwater intrusion.
- Foundation Weep Screed Blockage: Check the metal weep screed flashing at the base of the stucco wall. If soil, mulch, or concrete is blocking the drainage holes, water cannot exit the wall assembly. Building codes mandate that the weep screed clear raw earth by at least 4 inches and paved surfaces (such as concrete patios) by at least 2 inches.
- Delaminated or Soft Spots: Press firmly on areas showing bubbling or moisture staining. If the wall flexes or sounds hollow, the plaster base has delaminated from the metal lath due to prolonged moisture exposure.
Free Assessment
Noticing Stucco Damage?
Get a free on-site assessment from a licensed contractor. $0 deposit, no obligation.
GET FREE ASSESSMENT2. System Performance Comparison
If your inspection reveals sections that need replacement, choosing the right material for Southern California winters is key:
| System Type | Winter Performance & Moisture Characteristics | Best Use Case |
|---|---|---|
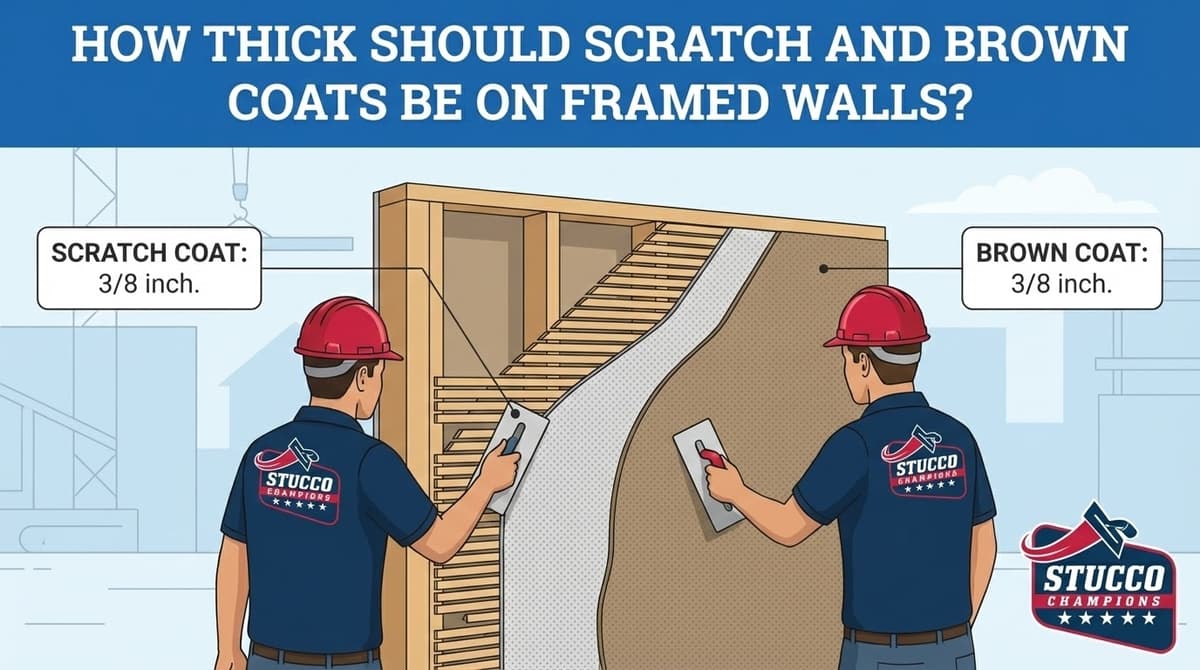
| Traditional Cement (3-Coat) | High vapor permeability (allows internal moisture to escape). High impact strength. Nominal thickness 7/8 inch. | Homes needing a breathable wall to dry out during wet winters (read our stucco thickness guide). |
| Acrylic / Synthetic Finish | Hydrophobic (water-repellent) exterior surface. Elastomeric flexibility (bridges hairline cracks). | Properties exposed to severe wind-driven rain or ocean spray. |
| EIFS (Synthetic Foam) | Barrier system with high insulation values (R-value). Vulnerable to pest punctures. | Inland structures prioritizing energy efficiency. |
3. Sealing the Building Envelope
Traditional cement stucco is naturally porous and absorbs water. To winter-proof it, you must manage this absorption through a proper cleaning and sealing hierarchy:
- Low-Pressure Wash: Clean the walls to remove dirt, mold, and oxidation. Sealing over a dirty surface prevents proper coating adhesion and causes bubbling.
- Elastomeric Crack Repair: For cracks wider than 1/16 inch, apply a high-performance texturized polyurethane or acrylic sealant (never use standard silicone caulk, as plaster paint will not bond to it).
- Vapor-Permeable Coating: Apply a high-performance elastomeric coating or traditional cementitious fog coat. This creates a barrier against bulk liquid water while maintaining vapor permeability, allowing trapped internal moisture to escape as vapor.
4. Critical Flashing Junctions
Most structural stucco leaks do not occur in the flat center of a wall; they happen at junctions and transitions:
- Roof-to-Wall Intersections: Verify that "kick-out flashing" is installed where the roofline or gutters terminate against a stucco wall. Without a kick-out flashing, gallons of roof runoff flow directly behind the stucco siding.
- Window Flashing Seals: Inspect the perimeter sealant joint between window frames and the stucco. If the caulk is cracked or missing, remove the old sealant and apply a new bead of premium polyurethane caulk immediately to prevent window leaks (see our retrofit window leak guide).
5. Timing Your Stucco Repairs
Cooler winter months are actually an excellent time for stucco patching and repairs, provided there is no active rain.
Cooler temperatures prevent the plaster mix water from evaporating too rapidly. This allows the cement to hydrate slowly, developing high compressive strength and a superior bond compared to repairs done during extreme summer heat. We only require a 48-hour window of dry weather above 40°F to execute patches safely.
Never apply elastomeric paint, sealers, or coatings over wet or recently saturated stucco. Doing so traps liquid water inside the wall. When the sun heats the wall, the trapped water turns into steam, creating high pressure that blisters the paint and causes delamination. Stucco must dry to below 15% moisture content before any coatings are applied.
Conclusion: Protect Your Investment
Winter-proofing your stucco is the most cost-effective insurance policy for your home's wood framing. Clearing your foundation weep screed, sealing stress cracks, and replacing old sealant joints before the rain arrives ensures your home remains watertight and structurally sound through winter storms.
Related Resources
If you noticed other symptoms during your walk, read our guide on common stucco problems and how to prevent them. For severe issues, consult our stucco water damage repair service page.
Need a Professional Stucco Assessment?
If you suspect active leaks or notice soft spots in your stucco, do not wait until the next major storm. Stucco Champions provides professional moisture inspections and repairs throughout Southern California. Contact Stucco Champions today for a free inspection and estimate!
A note on fog coat: Stucco Champions does not fog coat older or previously repaired walls. On aged stucco a fog coat telegraphs existing cracks, patch lines, and prior repairs, and it bonds poorly to a rough, chalky, or previously coated surface, so it can dust off or peel. Those walls get a fresh finish coat (re-stucco) instead.
Frequently Asked Questions About Stucco
How much does stucco repair cost in Orange County and Los Angeles?+
Stucco repair typically ranges from $500 for minor crack patching to $5,000+ for full re-stucco of a single elevation. The exact cost depends on the damage type (hairline cracks, water damage, delamination, weep screed failure), the square footage involved, and whether the original three-coat or one-coat stucco system needs to be matched. Stucco Champions provides fixed-price written estimates after a free on-site assessment — no hourly billing, no surprise change orders. See our stucco repair cost guide for detailed pricing by repair type.
How long does stucco last in Southern California?+
Properly installed three-coat stucco lasts 50-80+ years in Southern California's climate. The most common failure points aren't the stucco itself — they're the supporting components: corroded weep screed, deteriorated building paper behind the stucco, and improperly sealed window flashing. Most "stucco failures" are actually moisture-intrusion failures that start at one of these points. Annual visual inspection catches problems before they spread, which is why we offer free weep screed assessments for homeowners in our service area.
Can I repair stucco myself, or do I need a contractor?+
Hairline cracks under 1/8 inch wide can be sealed with elastomeric caulk by a homeowner. Anything larger — pattern cracks, delamination (where stucco pulls away from the wall), water-damaged areas, or chimney/window leak repairs — requires a licensed contractor. Improper DIY repair on these is the #1 cause of repeat failures because the underlying cause (usually moisture) isn't addressed. California's CSLB requires a license for any stucco work over $500. Looking for a highly-rated stucco contractor in Southern California? We are a CSLB-licensed and insured team ready to help.
How do I know if I need stucco repair vs. full re-stucco?+
If less than 30% of an elevation has visible damage, repair is the right call. If you see large areas of cracking, multiple zones of delamination, or the underlying paper and lath have rotted across an entire wall, full re-stucco of that elevation is more cost-effective long-term. Our free assessment includes a moisture survey and lath inspection so you get a defensible recommendation either way — not just a quote pushing whichever option costs more.
Do you offer warranties on stucco work?+
Approved stucco repair work includes a 1-year written workmanship warranty. The applicable terms are documented with the approved scope. Stucco Champions is CSLB licensed and insured; verify license #1122006 through the official state lookup. Request a free estimate to review the scope and warranty terms before you sign.
How long does a stucco repair take?+
Most patch repairs are completed in 1-2 days, including a 24-hour cure time before texture matching and color application. Full re-stucco of a single elevation runs 5-7 working days because each coat (scratch, brown, finish) needs to cure properly before the next is applied. We schedule around weather — California stucco needs daytime temperatures above 50°F with no rain forecast for at least 24 hours after each coat. Our crew shows up on time, every time.
Related Professional Services
A licensed assessment identifies the cause before the finish is opened or replaced.