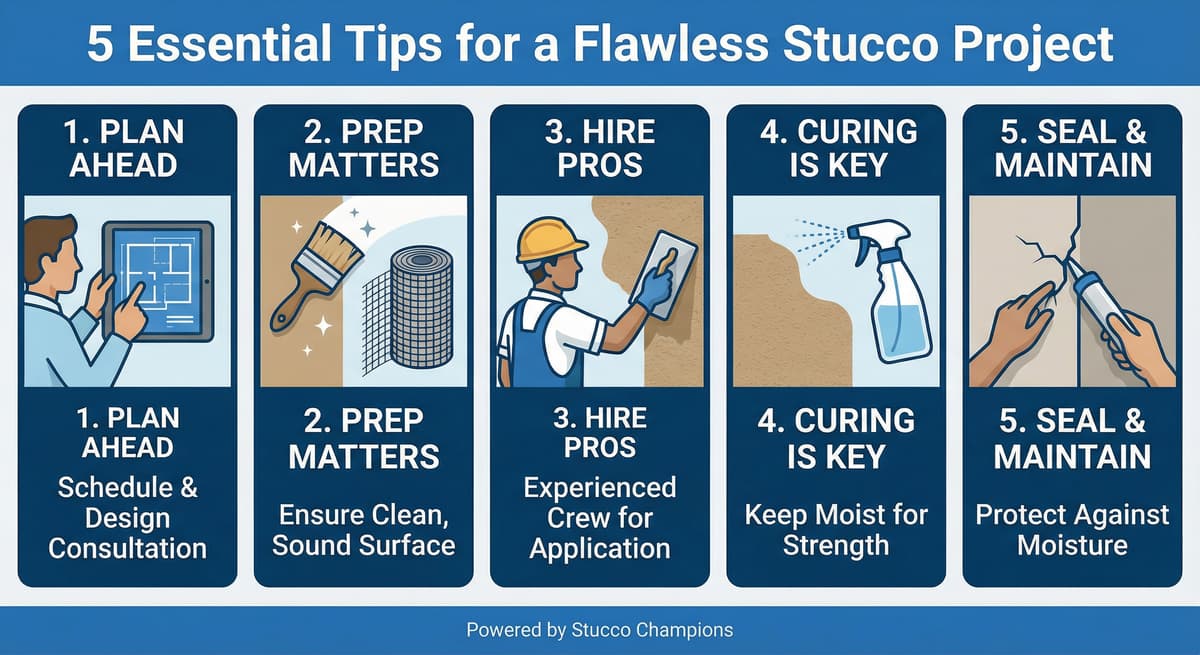
5 Essential Tips for a Flawless Stucco Project
Written by Stucco Champions — Southern California’s Authority on Exterior Plastering.
Stucco is not just a cosmetic finish—it is an engineered cladding system that serves as your home's primary protective envelope, fire shield, and long-term structural barrier. Whether you are building a custom home in Newport Beach or performing a complete re-stucco in Mission Viejo, a flawless installation depends on strict adherence to building codes, material chemistry, and environmental controls.
At Stucco Champions, we rely on technical precision and building science. We combine old-world plastering techniques with modern ASTM standards to deliver durable, weather-aware systems. Here are five essential tips to ensure your stucco project is completed flawlessly from preparation to final inspection.
1. Surface Preparation is Everything
Before applying a single trowel of mortar, the underlying substrate must be structurally sound and free of bond-inhibiting materials. If you are re-stuccoing over a previously painted home, sandblasting or hydro-blasting is mandatory to remove the paint barrier and restore mechanical suction. For new construction, we verify lath self-furring and sheathing integrity.
We strictly adhere to the double-layer weather-resistive barrier (WRB) requirement (specifically using 60-Minute Grade D Kraft paper like Super Jumbo Tex). Under California Residential Code Section R703.7.3, this double layer is required over wood-based sheathing. It acts as a cleavage plane, allowing the plaster to expand and contract independently from the framing, while creating a capillary break that drains water safely down to the foundation.
| Surface Prep Task | Why It Matters | ASTM / Code Compliance |
|---|---|---|
| Abrasive Sandblasting | Removes paint, oils, and dirt from older stucco. | Restores substrate suction and mechanical bonding keys. |
| Lath Self-Furring Check | Ensures lath is held 1/4" away from sheathing. | ASTM C1063 compliance; ensures plaster encases wire lath. |
| Moisture Barrier Check | Verifies shingle-lapping and flashing integration. | Prevents framing rot, water leaks, and structural decay. |
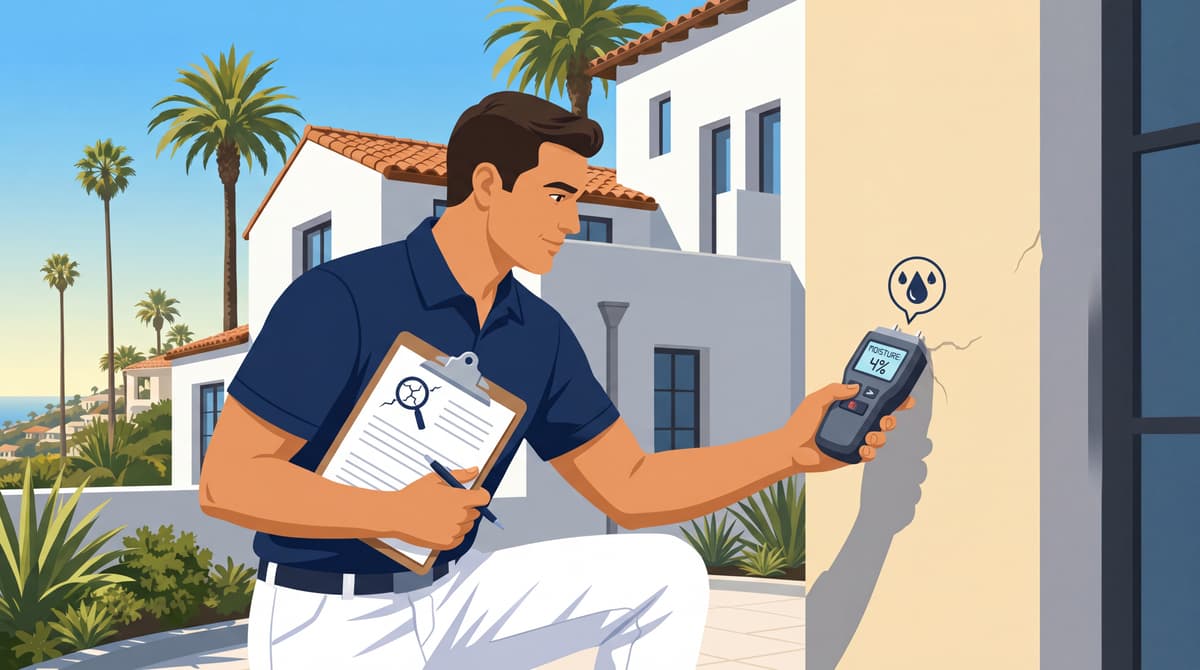
Free Assessment
Noticing Stucco Damage?
Get a free on-site assessment from a licensed contractor. $0 deposit, no obligation.
GET FREE ASSESSMENT2. Timing and Weather Constraints
Portland cement plaster is highly sensitive to environmental conditions during application. In Southern California, our primary challenge is "flash drying" caused by dry Santa Ana winds or ambient temperatures exceeding 90°F. If water evaporates from the wet mix before cement hydration completes, the chemical bond is permanently weakened, resulting in soft, brittle plaster.
| Weather Condition | Physical Risk to Plaster | Code-Compliant Best Practice |
|---|---|---|
| High Heat (> 90°F) or Wind | Flash drying, rapid shrinkage, severe checking. | Apply early in the morning, mist sheathing, and water-fog curing. |
| Rain or Freezing (< 40°F) | Washout, poor bonding, micro-structural freezing. | Suspend operations; wait for dry conditions and temperatures > 48°F. |
| High Salt / Coastal Air | Accelerated wire lath corrosion. | Install zinc-alloy or stainless-steel lath accessories (ASTM C1063). |
3. Proper Material Mix Proportions and Tool Selection
Not all plaster mixes are identical. We utilize premium factory-blended cements (like Omega Super Cement) to eliminate the inconsistency of field-mixing sand and plastic cement by hand. Mix proportions must comply with **ASTM C926 Table 3** (typically 1 part cement to 3 or 4 parts sand by volume).
- Traditional Three-Coat System: Consists of a scratch coat, brown coat, and finish coat to achieve a nominal **7/8-inch thickness**. Ideal for wood-framed residential homes requiring structural mass and a one-hour fire rating.
- One-Coat System: Uses a proprietary fiber-reinforced cement base coat over rigid EPS foam insulation boards. Excellent for continuous insulation (CI) and energy efficiency.
- Tool Standards: We utilize professional stainless-steel trowels, rods, and darbies (conforming to the Rod and Darby leveling method under ASTM C926) to ensure walls are flat and free of wave patterns.
4. Strict Curing and Hydration Protocols
Portland cement does not dry to harden—it cures through a chemical process called **hydration** that requires constant moisture. If a fresh scratch or brown coat dries out too quickly under the sun, it will never reach its rated compressive strength.
To ensure structural performance and reduce the risk of shrinkage cracks reflecting through the finish coat, we follow code-specified curing schedules:
- Scratch Coat: Moist cured (using a fine water fog) for a minimum of 48 hours.
- Brown Coat: Moist cured for a minimum of 48 hours. The base coats (scratch + brown) must cure and dry for a minimum of 7 days (and up to 14 days in dry climates) before any finish color coat is applied. This allows initial shrinkage to occur in the base layers, where cracks will be sealed and covered by the final 1/8-inch finish.
5. Final Inspection and Maintenance Planning
Once the stucco application is complete, long-term durability depends on protecting the wall envelope at its transition points. During our final client walkthrough, we inspect key clearances and flashing paths.
A leading cause of wood rot and termite infestation is blocking the drainage path. The metal weep screed at the base of your walls must remain clear to allow trapped moisture to escape:
- At least 4 inches of clearance above raw earth or soil.
- At least 2 inches of clearance above paved concrete surfaces (patios, walkways, or driveways).
Conclusion: Plastering as an Engineering Discipline
Exceptional stucco work is where architectural art meets building engineering. By adhering to ASTM specifications, verifying weather windows, and enforcing hydration schedules, Stucco Champions ensures your home's stucco exterior remains beautiful, fire-safe, and structurally sound for decades.
Ready to start your stucco project with licensed professionals?
Stucco Champions is a CSLB-licensed plastering contractor serving Orange County, Los Angeles, and surrounding Southern California communities. Contact us today for a professional consultation and free estimate!
Related Resources:
Learn more about building material specifications and global engineering standards by visiting the ASTM International organization.
Frequently Asked Questions About Stucco
How much does stucco repair cost in Orange County and Los Angeles?+
Stucco repair typically ranges from $500 for minor crack patching to $5,000+ for full re-stucco of a single elevation. The exact cost depends on the damage type (hairline cracks, water damage, delamination, weep screed failure), the square footage involved, and whether the original three-coat or one-coat stucco system needs to be matched. Stucco Champions provides fixed-price written estimates after a free on-site assessment — no hourly billing, no surprise change orders. See our stucco repair cost guide for detailed pricing by repair type.
How long does stucco last in Southern California?+
Properly installed three-coat stucco lasts 50-80+ years in Southern California's climate. The most common failure points aren't the stucco itself — they're the supporting components: corroded weep screed, deteriorated building paper behind the stucco, and improperly sealed window flashing. Most "stucco failures" are actually moisture-intrusion failures that start at one of these points. Annual visual inspection catches problems before they spread, which is why we offer free weep screed assessments for homeowners in our service area.
Can I repair stucco myself, or do I need a contractor?+
Hairline cracks under 1/8 inch wide can be sealed with elastomeric caulk by a homeowner. Anything larger — pattern cracks, delamination (where stucco pulls away from the wall), water-damaged areas, or chimney/window leak repairs — requires a licensed contractor. Improper DIY repair on these is the #1 cause of repeat failures because the underlying cause (usually moisture) isn't addressed. California's CSLB requires a license for any stucco work over $500. Looking for a highly-rated stucco contractor in Southern California? We are a CSLB-licensed and insured team ready to help.
How do I know if I need stucco repair vs. full re-stucco?+
If less than 30% of an elevation has visible damage, repair is the right call. If you see large areas of cracking, multiple zones of delamination, or the underlying paper and lath have rotted across an entire wall, full re-stucco of that elevation is more cost-effective long-term. Our free assessment includes a moisture survey and lath inspection so you get a defensible recommendation either way — not just a quote pushing whichever option costs more.
Do you offer warranties on stucco work?+
Yes. Stucco Champions provides a written 5-year workmanship warranty on all stucco repairs and a 10-year warranty on full re-stucco. We're a CSLB-licensed and insured contractor (license #1122006 — verifiable at cslb.ca.gov), which means our work is backed by California's contractor licensing board, not just our own promise. Request a free estimate to see the warranty terms in writing before you sign anything.
How long does a stucco repair take?+
Most patch repairs are completed in 1-2 days, including a 24-hour cure time before texture matching and color application. Full re-stucco of a single elevation runs 5-7 working days because each coat (scratch, brown, finish) needs to cure properly before the next is applied. We schedule around weather — California stucco needs daytime temperatures above 50°F with no rain forecast for at least 24 hours after each coat. Our crew shows up on time, every time.
Related Professional Services
A licensed assessment identifies the cause before the finish is opened or replaced.