Is Stucco Weep Screed Required? Framed Walls, Masonry Exceptions & Retrofit Rules
Is Stucco Weep Screed Required? Framed Walls, Masonry Exceptions & Retrofit Rules
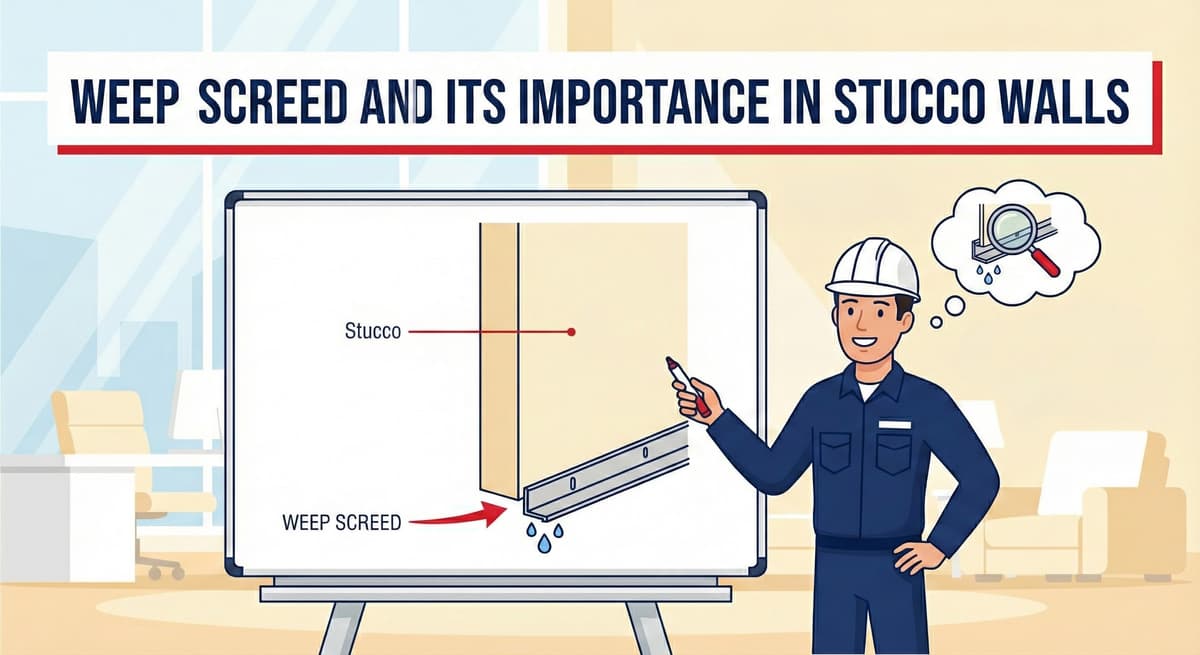
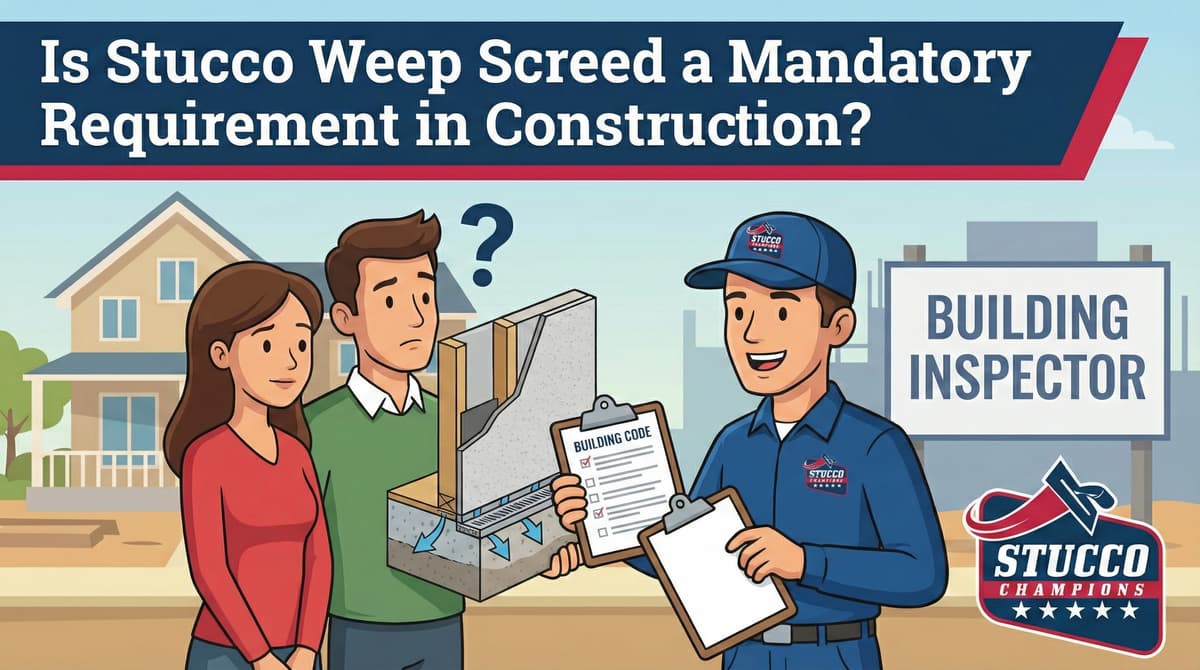
Short answer: on modern exterior framed walls, a stucco weep screed is normally required at the base of the wall where the plaster assembly terminates at a floor, foundation, or similar support. Its job is not decorative. It creates a clean plaster stop and gives incidental moisture behind the stucco a path to drain to the exterior.
The important detail is context. A weep screed requirement is usually tied to framed wall construction with a water-resistive barrier, lath, and portland cement plaster. Solid concrete or masonry walls, older existing walls, and isolated repairs can be handled differently depending on the assembly, permit scope, and local code interpretation.
Free Assessment
Noticing Stucco Damage?
Get a free on-site assessment from a licensed contractor. $0 deposit, no obligation.
GET FREE ASSESSMENTWhat a weep screed actually does
A weep screed sits at the bottom edge of a framed stucco wall. Technical guidance such as ASTM C1063 and PCA plaster guidance describe a foundation weep screed at the bottom of exterior walls, below the floor line, wherever the wall is supported by a foundation or floor. The function is simple:
- It acts as a plaster stop so the stucco terminates cleanly at the base.
- It helps direct incidental moisture from the drainage plane to the exterior.
- It protects the lower edge of the wall from being buried in stucco, soil, paving, or sealant.
- It supports the correct transition between lath, water-resistive barrier, flashing, and the wall base.
That last point matters most. A weep screed only works when the paper, flashing, lath, and clearances are integrated correctly. A surface trim piece installed after the fact is not the same as a functional weep screed tied into the drainage plane.
Is it mandatory on every stucco wall?
No. It is safer to say a weep screed is required for the common modern framed-wall stucco assembly, not for every possible wall that has stucco on it.
| Wall condition | How to think about the requirement |
|---|---|
| New framed exterior wall | Expect a weep screed at the base of the stucco wall, integrated with WRB and lath. |
| Full re-stucco over framing | Often treated like a new assembly because lath, paper, accessories, and terminations are being rebuilt. |
| Solid concrete or masonry wall | May use a different two-coat approach or termination detail because there is no framed drainage cavity behind lath. |
| Small patch repair | The repair should match and protect the existing assembly; it may not trigger a full wall rebuild, but water management still matters. |
| Older home with no visible screed | Not automatically illegal. It should be evaluated before repainting, re-stucco, grade changes, or moisture repairs. |
Framed walls: where the requirement matters most
On wood-framed or steel-framed exterior walls, stucco is not a waterproof skin by itself. Small amounts of wind-driven rain and condensation can get behind the cement plaster. That is why the wall uses a water-resistive barrier, flashing, lath, and drainage/termination details.
The weep screed is the exit point at the bottom of that system. If the bottom edge is buried by concrete, soil, mulch, foam, caulk, or a patio overlay, moisture may lose its path out. That can lead to staining, rusted lath, swollen trim, soft sheathing, or recurring cracking near the base of the wall.
Masonry and concrete walls are different
Concrete block, poured concrete, and some masonry walls can receive cement plaster differently than framed walls. In many cases, a direct-applied two-coat plaster system is used when the wall provides a suitable bond. Lath may not be used unless the surface condition, thickness, or specification requires it.
That does not mean drainage and termination details can be ignored. It means the correct detail may not be the same foundation weep screed used on framed construction. A qualified plasterer should look at the substrate, finish thickness, exposure, grade, and local inspection requirements before choosing the termination.
Common weep screed mistakes
- Confusing casing bead with weep screed: casing bead is a plaster stop, but it does not automatically provide the same drainage function.
- Burying the screed: soil, concrete, pavers, or planter beds should not block the weep path.
- Installing trim over the surface: retrofit screed work usually requires cutting back stucco and integrating the WRB and lath, not just attaching a strip to the face.
- Reverse-lapping paper: water-resistive barrier and flashing must shed water outward. Reverse laps can push water into the wall.
- Using the wrong ground: accessories must match the intended stucco thickness so the finished wall has proper coverage.
What if your existing house has no weep screed?
Many older Southern California homes were built before today’s common details were enforced consistently. Missing weep screed does not automatically mean the entire home is failing. The practical question is whether the wall is dry, whether the base is buried, whether there are stains or soft areas, and whether future work will disturb enough stucco to upgrade the detail.
If you are doing a full re-stucco, repairing base-of-wall moisture damage, replacing lath, or opening the wall for structural work, the correct approach is usually to install a proper screed and rebuild the drainage detail. For small cosmetic patches, the scope may be narrower, but you still do not want to trap water.
Bottom line
A stucco weep screed is not just a finishing accessory. On modern framed exterior stucco walls, it is a core drainage and termination component. The best answer is not “always” or “never.” The correct answer depends on the wall type, project scope, local code, and whether the water-resistive barrier can actually drain to the exterior.
If you are unsure whether your wall needs a new weep screed, start with the assembly: framing or masonry, lath or direct-applied plaster, full re-stucco or small repair, exposed base or buried base. That will tell you whether the detail needs to be repaired, retrofitted, or simply protected during maintenance.
Frequently Asked Questions About Stucco
How much does stucco repair cost in Orange County and Los Angeles?+
Stucco repair typically ranges from $500 for minor crack patching to $5,000+ for full re-stucco of a single elevation. The exact cost depends on the damage type (hairline cracks, water damage, delamination, weep screed failure), the square footage involved, and whether the original three-coat or one-coat stucco system needs to be matched. Stucco Champions provides fixed-price written estimates after a free on-site assessment — no hourly billing, no surprise change orders. See our stucco repair cost guide for detailed pricing by repair type.
How long does stucco last in Southern California?+
Properly installed three-coat stucco lasts 50-80+ years in Southern California's climate. The most common failure points aren't the stucco itself — they're the supporting components: corroded weep screed, deteriorated building paper behind the stucco, and improperly sealed window flashing. Most "stucco failures" are actually moisture-intrusion failures that start at one of these points. Annual visual inspection catches problems before they spread, which is why we offer free weep screed assessments for homeowners in our service area.
Can I repair stucco myself, or do I need a contractor?+
Hairline cracks under 1/8 inch wide can be sealed with elastomeric caulk by a homeowner. Anything larger — pattern cracks, delamination (where stucco pulls away from the wall), water-damaged areas, or chimney/window leak repairs — requires a licensed contractor. Improper DIY repair on these is the #1 cause of repeat failures because the underlying cause (usually moisture) isn't addressed. California's CSLB requires a license for any stucco work over $500. Looking for a highly-rated stucco contractor in Southern California? We are a CSLB-licensed and insured team ready to help.
How do I know if I need stucco repair vs. full re-stucco?+
If less than 30% of an elevation has visible damage, repair is the right call. If you see large areas of cracking, multiple zones of delamination, or the underlying paper and lath have rotted across an entire wall, full re-stucco of that elevation is more cost-effective long-term. Our free assessment includes a moisture survey and lath inspection so you get a defensible recommendation either way — not just a quote pushing whichever option costs more.
Do you offer warranties on stucco work?+
Approved stucco repair work includes a 1-year written workmanship warranty. The applicable terms are documented with the approved scope. Stucco Champions is CSLB licensed and insured; verify license #1122006 through the official state lookup. Request a free estimate to review the scope and warranty terms before you sign.
How long does a stucco repair take?+
Most patch repairs are completed in 1-2 days, including a 24-hour cure time before texture matching and color application. Full re-stucco of a single elevation runs 5-7 working days because each coat (scratch, brown, finish) needs to cure properly before the next is applied. We schedule around weather — California stucco needs daytime temperatures above 50°F with no rain forecast for at least 24 hours after each coat. Our crew shows up on time, every time.
Stucco Diagnostics & Calculators
Diagnose specific wall damage symptoms or estimate job scope with our free guides and calculators.
Related Professional Services
A licensed assessment identifies the cause before the finish is opened or replaced.