Stucco Repair: A Comprehensive Guide
Written by Stucco Champions — Southern California’s Authority on Exterior Plastering.
Stucco Repair 101: How to Install Fixtures Without Ruining Your Wall
In Southern California, stucco is ubiquitous. But what happens when you need to cut into it? Whether you are adding a dryer vent, replacing a hose bib, or installing a new electrical sub-panel, cutting a hole in your exterior wall compromises the waterproofing system.
If you just "patch it up" with some spackle, water will eventually find its way into the wall cavity. This guide outlines the professional protocol for performing a small surgical repair (under 10 sq. ft.) that restores the structural and waterproof integrity of the home.
1. The Tools of the Trade
You cannot do this with standard drywall tools. Stucco is Portland cement; it destroys cheap equipment.
- Aviation Snips: Specifically "Center Cut" for slicing through wire mesh.
- Diamond Blade: For an angle grinder (if making straight cuts) or a cold chisel (for irregular chipping).
- Polyurethane Caulk: Do not use silicone. Use Sikaflex or equivalent.
- Bonding Agent: Weld-Crete or acrylic admix.
Free Assessment
Noticing Stucco Damage?
Get a free on-site assessment from a licensed contractor. $0 deposit, no obligation.
GET FREE ASSESSMENT2. Step 1: The "Soft" Demolition
When opening a wall, brute force is your enemy. If you smash the stucco with a sledgehammer, you will vibrate the wall and crack the paper/lath bond three feet away.
The Technique: Gently chip away the stucco around the installation zone.
Crucial Detail: Do not cut the wire flush with the opening. You must leave 3 to 6 inches of exposed wire mesh around the perimeter. This existing wire is the "rebar" that you will tie your new patch into.
3. Step 2: Integrating the Fixture
Once the hole is open, install your vent or pipe.
The Seal: Apply a heavy bead of Polyurethane Caulk around the flange of the fixture where it meets the building paper (not just the stucco). This is your primary water seal.
⚠️ The Lathing Rule
Never patch a hole without lath. You must install a new piece of galvanized wire mesh over the patch area. Wire-tie the new mesh to the old, exposed mesh you saved during demolition. This creates a continuous steel matrix that prevents the patch from falling out during a seismic event.
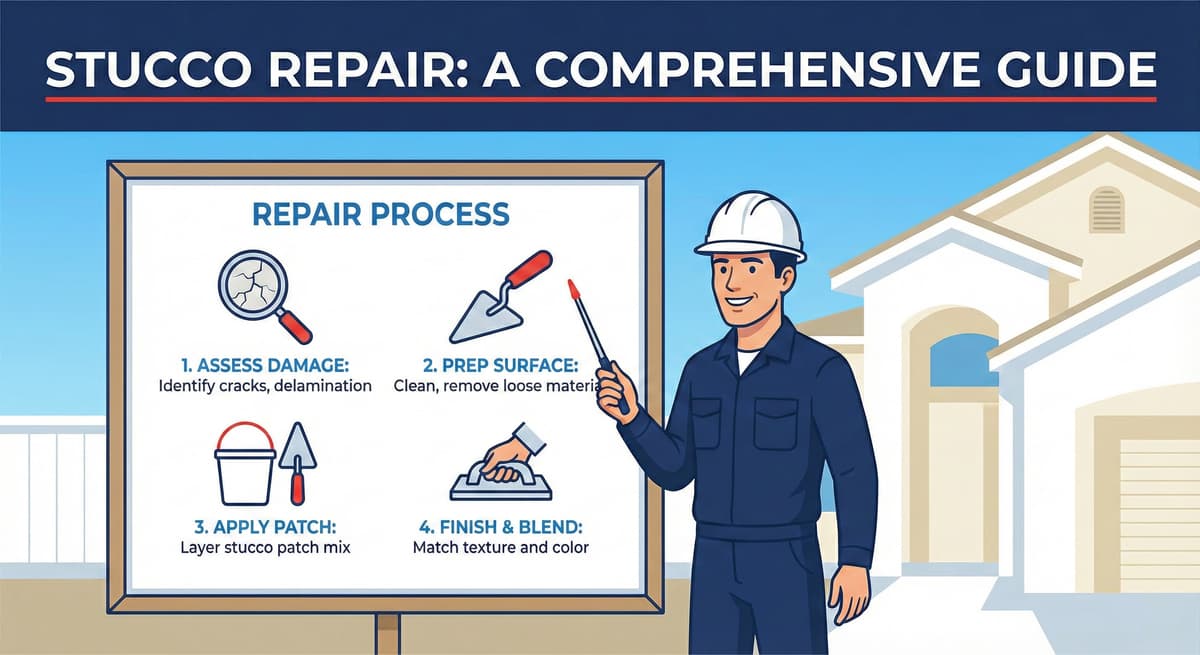
4. Step 3: The Scratch & Brown (Base Coats)
You cannot fill a deep hole in one pass. It will slump and crack.
- Scratch Coat: Apply the first layer of plastic cement, pushing it hard through the wire to key it in. While wet, scratch horizontal grooves into it. Let cure for 48 hours.
- Brown Coat: Apply the second layer to bring the surface flush with the existing wall. Use a rod (straightedge) to ensure it is flat. Float it with a sponge float to open the pores.
Feathering: This is the secret to an invisible patch. Thin out the edges of the new cement so it overlaps the old painted surface by an inch, blurring the transition line.
5. Step 4: The Texture Match
After the brown coat has cured (ideally 7 days for pH neutralization), apply the color finish.
Texture: If you have a heavy "Spanish Lace," you need to throw the mud on and flatten it. If you have a "Sand Finish," you need a green sponge float.
Note: The texture determines the shadow. If the patch is smoother than the wall, it will shine. If it is rougher, it will look dark.
Conclusion: Integrity First
A small patch seems simple, but it involves three trades: waterproofing, lathing, and plastering. By following the ASTM protocol—saving the wire, layering the cement, and feathering the edge—you ensure the repair is not just a cosmetic cover-up, but a structural restoration.
Related Resources
Last week, we shared Can You Apply Stucco Over T-111 Siding? If you are looking at a larger remodel, check this out.