Stucco Repairs: Materials, Methods & When to Call a Pro

Written by Stucco Champions - Southern California's Authority on Exterior Plastering.
Stucco repairs only last when the repair method matches the damage. A durable patch is not just a layer of cement over a crack. A proper repair rebuilds the wall system: weather barrier, lath, base coat, finish coat, texture, and color. If one layer is skipped, the repair may look fine for a few weeks and then crack, leak, stain, or separate from the wall.
For a small cosmetic crack, the materials may be as simple as a textured elastomeric sealant and paint. For a deeper hole, plumbing cutout, delaminated section, or water-damaged area, the material list gets much more serious. You may need building paper, galvanized lath, fasteners, plaster sand, cement base coat material, finish coat material, and texture-matching tools.
This guide explains the most common types of stucco repairs, the essential stucco repair materials, when each one is used, and how those materials fit into the professional repair sequence.
Quick Stucco Repair Materials Checklist
For most structural stucco patches, the basic material list includes:
- Diamond blade and grinder: Used to cut clean repair edges instead of leaving a jagged hole.
- Hammer and cold chisel: Used to remove damaged stucco inside the cut line.
- Grade D building paper or approved weather-resistive barrier: Restores the drainage plane behind the stucco.
- Galvanized metal lath or wire mesh: Gives the patch mechanical reinforcement.
- Galvanized staples, nails, or lath fasteners: Secures the mesh to framing or existing sound lath.
- Plastic cement or stucco base coat material: Used for the scratch and brown coats.
- Washed plaster sand: Provides body and strength in site-mixed cement plaster.
- Finish coat material: Creates the visible texture and color of the repair.
- Hawk, trowel, float, straightedge, and texture tools: Used to place, flatten, and blend the repair.
- Paint, fog coat, or color coat strategy: Helps blend the repaired area after curing.
Not every repair needs every item. A hairline crack has a different material list than a failed wall section. If you are not sure whether the damage is cosmetic or structural, compare the repair options in our guide to fixing stucco cracks.
Free Assessment
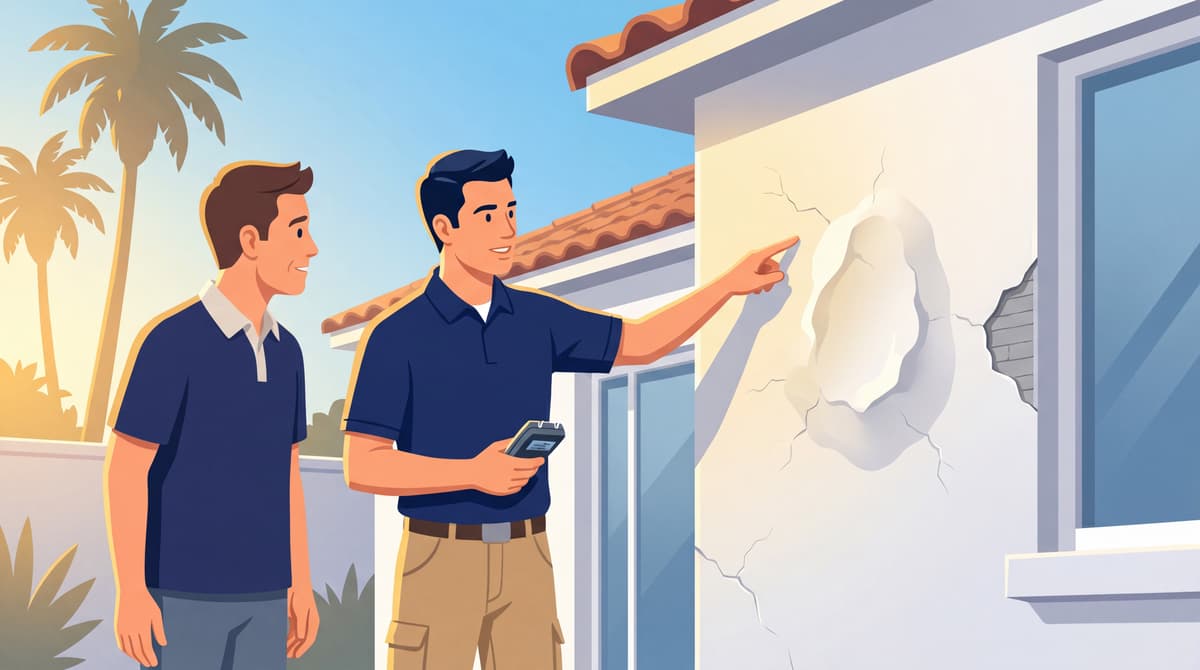
Noticing Stucco Damage?
Get a free on-site assessment from a licensed contractor. $0 deposit, no obligation.
GET FREE ASSESSMENTCommon Types of Stucco Repairs
Most stucco repairs fall into a few practical categories. The category matters because it controls the material list, labor, cure time, and whether the repair is only cosmetic or part of the wall system.
- Crack sealing: Used for narrow cosmetic cracks where the stucco is still bonded and dry.
- Surface patching: Used for chips, shallow gouges, small holes, and damaged finish coat areas.
- Structural patching: Used when the repair needs new paper, lath, scratch coat, brown coat, and finish coat.
- Moisture-related repairs: Used when staining, softness, bubbling, or recurring cracks point to trapped water.
- Texture and color blending: Used after the wall is repaired so the patch does not stand out from the surrounding stucco.
The safest approach is to diagnose the wall first, then choose the repair type. Treating every crack or hole the same way is one of the fastest ways to create repeat stucco repairs.
1. Diagnose the Damage Before Buying Materials
Before buying stucco repair materials, identify what you are repairing. The material list should match the failure, not the other way around.
| Damage Type | Typical Materials Needed | Repair Level |
|---|---|---|
| Hairline cracks | Textured elastomeric sealant, small brush, paint or coating. | Cosmetic sealing. |
| Small chips or shallow surface damage | Patching material, float, sponge, texture tools, color blend. | Surface patch. |
| Deep holes or impact damage | Building paper, lath, fasteners, scratch coat, brown coat, finish coat. | Full patch rebuild. |
| Soft, stained, or recurring damage | Inspection first; may require substrate, flashing, or moisture repair before stucco materials. | Diagnostic repair. |
Do not cover active water damage with new stucco. If the wall is soft, stained, bubbling, or repeatedly cracking in the same area, the repair may need moisture investigation first. See our stucco water damage repair page for moisture-related warning signs.
2. Cosmetic Crack Materials
Thin cracks less than about 1/16 inch are often cosmetic shrinkage or movement cracks. These do not always require demolition, but they still need the right material. Ordinary painter's caulk is usually a poor choice because it can shrink, look shiny, or fail to match the surrounding texture.
Common cosmetic crack materials include:
- Textured elastomeric sealant: Flexible sealant designed for exterior masonry and stucco movement.
- Backer rod: Used when the crack or joint is wide enough to control sealant depth.
- Small brush or sponge: Helps soften the sealant edge before it skins over.
- Compatible coating or paint: Blends the repaired crack into the wall after the sealant cures.
Crack sealing is best for narrow movement cracks, not missing stucco, hollow areas, or water-damaged wall sections. If the surface has chips, holes, or visible texture loss, review our stucco patching and texture matching guidance.
3. Structural Patch Materials
A structural stucco patch needs more than a bag of patching compound. It has to reconnect to the existing wall system so the new section can drain, grip, and move with the surrounding stucco.
The most important structural stucco repair materials are the hidden ones:
- Weather-resistive barrier: Grade D building paper or another approved WRB protects the sheathing and directs incidental moisture downward.
- Galvanized lath: Metal lath gives cement plaster a reinforced base to lock into.
- Galvanized fasteners: Corrosion-resistant staples or nails hold the lath in place without rusting out quickly.
- Lath ties or overlap: The new lath must tie into sound existing lath where possible to reduce perimeter cracking.
This is where many DIY repairs fail. If new paper is installed flat over the hole without proper lapping, water can run behind the repair. If new mesh is not tied into the existing mesh, the patch can crack around the outline of the cut.
4. Base Coat Materials: Scratch and Brown
The base coat gives the patch thickness and strength. Traditional three-coat stucco uses a scratch coat and brown coat before the finish coat. For patches, the material may be site-mixed or bagged, depending on the repair size and the existing wall.
Common base coat materials include:
- Plastic cement or Portland cement plaster material: The cementitious binder for the patch.
- Washed plaster sand: The aggregate that gives the mix body, strength, and workability.
- Clean water: Added carefully so the mix is workable without becoming weak or soupy.
- Bonding or admixture products: Used only when appropriate for the system and manufacturer instructions.
Sand selection affects the patch. Sand that is too fine, dirty, or rounded can make the repair weaker or harder to texture correctly. For more detail, see our guide to selecting the right sand for stucco projects.
5. Finish Coat and Texture Materials
The finish coat is the visible layer. This is where the repair either blends into the home or stands out. The right finish material depends on the existing texture, aggregate size, color, and whether the wall has a cement, acrylic, painted, or previously coated finish.
Finish coat stucco repair materials may include:
- Cement color coat: Traditional finish material used on many older and classic stucco homes.
- Acrylic finish: Pre-mixed finish used for stronger color consistency and certain modern textures.
- Matching aggregate: Fine, medium, or coarse sand selected to match the existing surface.
- Float, sponge, brush, or dash tools: Texture tools chosen to match the wall pattern.
- Fog coat, paint, or wall-plane coating: Often needed because new stucco rarely matches old sun-faded stucco perfectly.
Texture matching is usually the hardest part of a visible repair. A patch can be structurally correct and still look bad if the finish coat uses the wrong sand size or tool technique.
6. Step-by-Step Repair Sequence
Once the right materials are selected, the repair sequence matters. Stucco is a layered wall system, so the work needs to rebuild those layers in the correct order.
Step 1: Cut a Clean Repair Area
Use a diamond blade to cut a clean square or rectangle around the damaged area. New cement does not bond cleanly to a crumbling, irregular edge. A clean cut also makes it easier to rebuild the lath and paper correctly.
Step 2: Remove Damaged Stucco
Break out the damaged material inside the cut line with a hammer and cold chisel. If the existing lath is rusted, cut, or loose, open the repair farther until you reach sound material.
Step 3: Rebuild the Weather Barrier
Install new building paper or WRB using a shingle-lap approach. The top of the new paper should tuck under the existing paper above the opening, while the bottom should lap over the paper below. This keeps water moving down and out instead of into the wall cavity.
Step 4: Install and Tie In New Lath
Cut galvanized metal lath to fit the opening and secure it with corrosion-resistant fasteners. Where possible, tie the new lath into exposed existing lath around the perimeter. This helps prevent a square crack from forming around the repair later.
Step 5: Apply Scratch and Brown Coats
Apply the scratch coat first and press it firmly into the lath. Scratch horizontal grooves while it is wet so the next coat has a mechanical key. After curing, apply the brown coat and bring the patch flush with the surrounding wall.
Step 6: Match the Finish
After the base coat cures and shrinks, apply the finish coat. Match the texture as closely as possible and plan for color blending. On many older walls, the cleanest result comes from coating or fog coating a larger wall plane instead of expecting a small patch to disappear.
Materials You Should Not Use for Stucco Repair
The wrong materials can make a small repair worse. Avoid these common mistakes:
- Drywall mud or interior patching compound: These are not exterior stucco materials.
- Spray foam as a patch filler: Foam does not replace lath, base coat, or finish coat.
- Painter's caulk for large cracks or holes: Caulk cannot rebuild missing stucco.
- Non-breathable coatings over wet walls: These can trap moisture and accelerate hidden damage.
- Random sand or play sand: Poor aggregate selection can weaken the patch and ruin texture matching.
When to Call a Stucco Contractor
Some repairs are reasonable for a careful homeowner. Others need a contractor because the risk is behind the wall, not on the surface.
Call a professional if the stucco is soft, hollow, rust-stained, wet, delaminated, or damaged around windows, doors, decks, parapets, or the base of the wall. These areas often involve flashing, drainage, lath corrosion, or substrate repair, not just surface materials.
Our stucco repair service explains how we evaluate the wall system before deciding whether a patch, section repair, or larger wall repair is the right approach. For budget planning, see the stucco repair cost guide.
Final Recommendation
The best stucco repair materials depend on the type of damage. Hairline cracks may only need flexible sealant and coating. Holes, delamination, plumbing cutouts, and moisture-damaged sections need a full system repair with weather barrier, lath, base coat, finish coat, and texture matching.
If you are repairing stucco, do not start with the finish coat. Start with the wall system. A repair that restores the hidden layers first will last longer, resist moisture better, and look cleaner once the final texture is applied.
Need help choosing the right repair materials? Contact Stucco Champions for a free consultation and a repair recommendation based on your wall condition.
Frequently Asked Questions About Stucco
How much does stucco repair cost in Orange County and Los Angeles?+
Stucco repair typically ranges from $500 for minor crack patching to $5,000+ for full re-stucco of a single elevation. The exact cost depends on the damage type (hairline cracks, water damage, delamination, weep screed failure), the square footage involved, and whether the original three-coat or one-coat stucco system needs to be matched. Stucco Champions provides fixed-price written estimates after a free on-site assessment — no hourly billing, no surprise change orders. See our stucco repair cost guide for detailed pricing by repair type.
How long does stucco last in Southern California?+
Properly installed three-coat stucco lasts 50-80+ years in Southern California's climate. The most common failure points aren't the stucco itself — they're the supporting components: corroded weep screed, deteriorated building paper behind the stucco, and improperly sealed window flashing. Most "stucco failures" are actually moisture-intrusion failures that start at one of these points. Annual visual inspection catches problems before they spread, which is why we offer free weep screed assessments for homeowners in our service area.
Can I repair stucco myself, or do I need a contractor?+
Hairline cracks under 1/8 inch wide can be sealed with elastomeric caulk by a homeowner. Anything larger — pattern cracks, delamination (where stucco pulls away from the wall), water-damaged areas, or chimney/window leak repairs — requires a licensed contractor. Improper DIY repair on these is the #1 cause of repeat failures because the underlying cause (usually moisture) isn't addressed. California's CSLB requires a license for any stucco work over $500. Looking for a highly-rated stucco contractor in Southern California? We are a CSLB-licensed and insured team ready to help.
How do I know if I need stucco repair vs. full re-stucco?+
If less than 30% of an elevation has visible damage, repair is the right call. If you see large areas of cracking, multiple zones of delamination, or the underlying paper and lath have rotted across an entire wall, full re-stucco of that elevation is more cost-effective long-term. Our free assessment includes a moisture survey and lath inspection so you get a defensible recommendation either way — not just a quote pushing whichever option costs more.
Do you offer warranties on stucco work?+
Yes. Stucco Champions provides a written 5-year workmanship warranty on all stucco repairs and a 10-year warranty on full re-stucco. We're a CSLB-licensed and insured contractor (license #1122006 — verifiable at cslb.ca.gov), which means our work is backed by California's contractor licensing board, not just our own promise. Request a free estimate to see the warranty terms in writing before you sign anything.
How long does a stucco repair take?+
Most patch repairs are completed in 1-2 days, including a 24-hour cure time before texture matching and color application. Full re-stucco of a single elevation runs 5-7 working days because each coat (scratch, brown, finish) needs to cure properly before the next is applied. We schedule around weather — California stucco needs daytime temperatures above 50°F with no rain forecast for at least 24 hours after each coat. Our crew shows up on time, every time.