Can You Re
Written by Stucco Champions — Southern California’s Authority on Exterior Plastering.
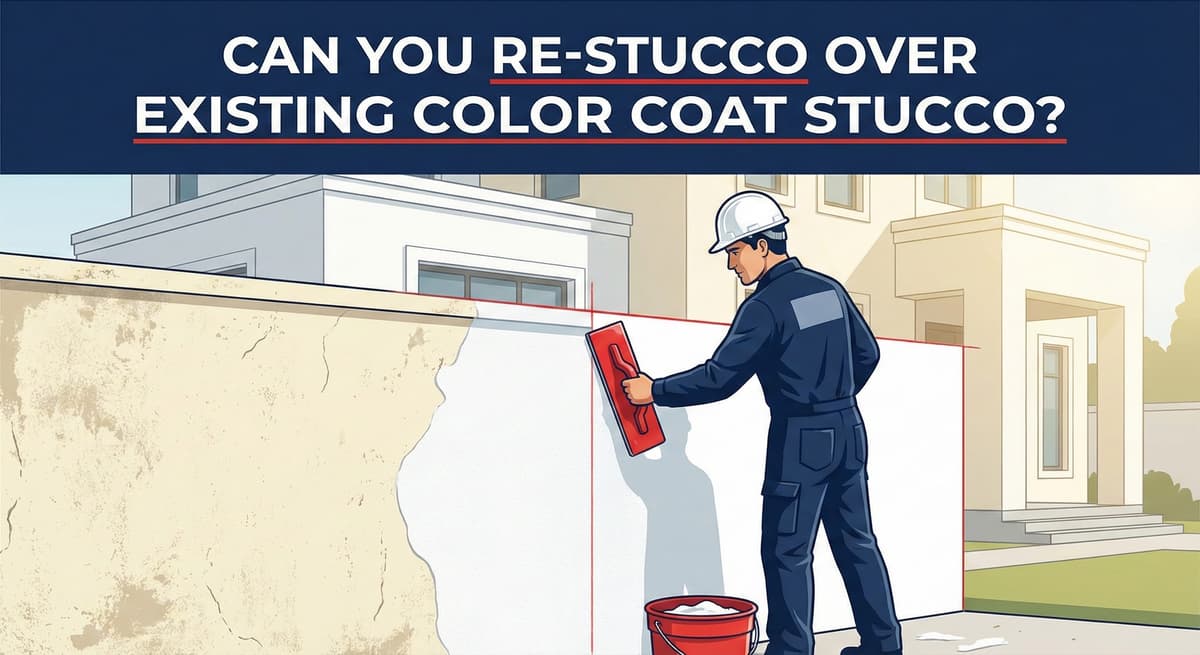
Re-Stucco Over Existing Stucco: Is It Possible?
One of the most frequent questions we receive from Southern California homeowners is: "Can I apply new stucco directly over my old stucco without tearing it all off?"
The short answer is Yes, but with significant technical conditions. You cannot simply apply fresh cement over an old, dirty, or painted wall and expect it to stick. The bond between the new coat and the old substrate is the difference between a 20-year finish and a delaminating failure. This guide explains the mechanical and chemical requirements for a successful re-stucco overlay.
1. The "Bond" Challenge: Prep is Everything
New stucco needs a rough, open-pore surface to grip onto (a "mechanical key"). If your existing wall is painted or sealed, it is as slick as glass to new cement.
Free Assessment
Noticing Stucco Damage?
Get a free on-site assessment from a licensed contractor. $0 deposit, no obligation.
GET FREE ASSESSMENTScenario A: Unpainted Stucco
If your home has original, porous stucco that has never been painted, we can often pressure wash it (to remove dirt/oxidation) and apply a Bonding Agent. This glue-like primer ensures the new finish adheres to the old.
Scenario B: Painted Stucco (The Standard)
Most homes in SoCal have been painted at least once. You cannot stucco directly over paint.
The Protocol: We must Sandblast the entire exterior to strip the paint and expose the raw aggregate. This is the only way to guarantee a mechanical bond that meets ASTM standards.
2. Material Selection: Cement vs. Acrylic
When resurfacing, you generally want to match the chemistry of the new layer to your performance goals.
Cement-Based FinishBest For: Authentic Spanish or Tuscan styles.
Why: It breathes. It creates a natural, mottled look that ages gracefully. However, it is rigid and may develop hairline cracks if the underlying wall has movement issues.
Best For: Modern homes or crack-prone walls.
Why: It is flexible (elastomeric). It bridges minor existing cracks and holds dark colors without fading. If you are going over a wall that has settled, Acrylic is the superior choice for hiding flaws.
3. The "Brown Coat" Resurface (Leveling)
If you want to change the texture significantly (e.g., going from a heavy "Lace" to a smooth "Santa Barbara"), we cannot just apply a finish coat.
The Fix: We apply a new Polymer-Modified Brown Coat first. This levels out the peaks and valleys of the old texture, creating a flat canvas for the new smooth finish. Skipping this step will result in the old texture "telegraphing" (showing through) the new coat.
4. Critical Details: Windows and Weeps
Adding a new layer of stucco thickens the wall by 1/8" to 1/4". You must consider the transitions.
⚠️ Flush WindowsIf your windows are currently flush with the stucco, adding more material will bury the frame. We may need to install new metal trim or plaster stops to create a clean termination point.
Weep Screeds: Never bury the weep screed at the foundation. The new stucco must stop cleanly at the drainage line to prevent water entrapment.
Conclusion: A Fresh Start Without Demolition
Re-stuccoing over existing walls is efficient and cost-effective, provided the prep work (sandblasting) is done correctly. It avoids the massive labor cost of stripping the house down to the studs while giving you a brand-new, warranted exterior.
Related ResourcesLast week, we shared Home Repairs Experts in Southern California. If you have structural damage, fix that before resurfacing.