When to Re
Written by Stucco Champions — Southern California’s Authority on Exterior Plastering.
Re-Stuccoing Your Home: The Best Way to Refresh, Repair, and Recolor
When most homeowners think of "Re-Stucco," they imagine a color change or a texture update. While aesthetics are a major benefit, true Re-Stucco is a structural maintenance event. It is the process of resetting the clock on your home’s exterior envelope.
In Southern California, where UV radiation and salt air degrade building materials, a Re-Stucco project is the most effective way to waterproof and reinforce an aging home without performing a complete demolition. This guide explores the technical depths of the process.
1. Re-Stucco vs. Painting: The Chemical Difference
We are often asked: "Why shouldn't I just paint it?"
Painting is a surface film. It covers the dirt, but it seals the pores.
Re-Stuccoing (Resurfacing) involves applying a new layer of cementitious material over the existing wall. This adds mass, impact resistance, and restores the breathability of the system. It integrates with the existing structure rather than just sitting on top of it.
Free Assessment
Noticing Stucco Damage?
Get a free on-site assessment from a licensed contractor. $0 deposit, no obligation.
GET FREE ASSESSMENT2. Phase 1: The Sandblast (Surface Prep)
If your home has ever been painted, we cannot simply apply new stucco over it. New cement will not bond to old paint; it will flake off in sheets.
⚠️ The Mandate
Sandblasting (or Hydro-Blasting) is non-negotiable. We must strip the layers of old paint and grime to expose the raw, open-pore cement underneath. This creates a "mechanical key" for the new stucco to lock into.
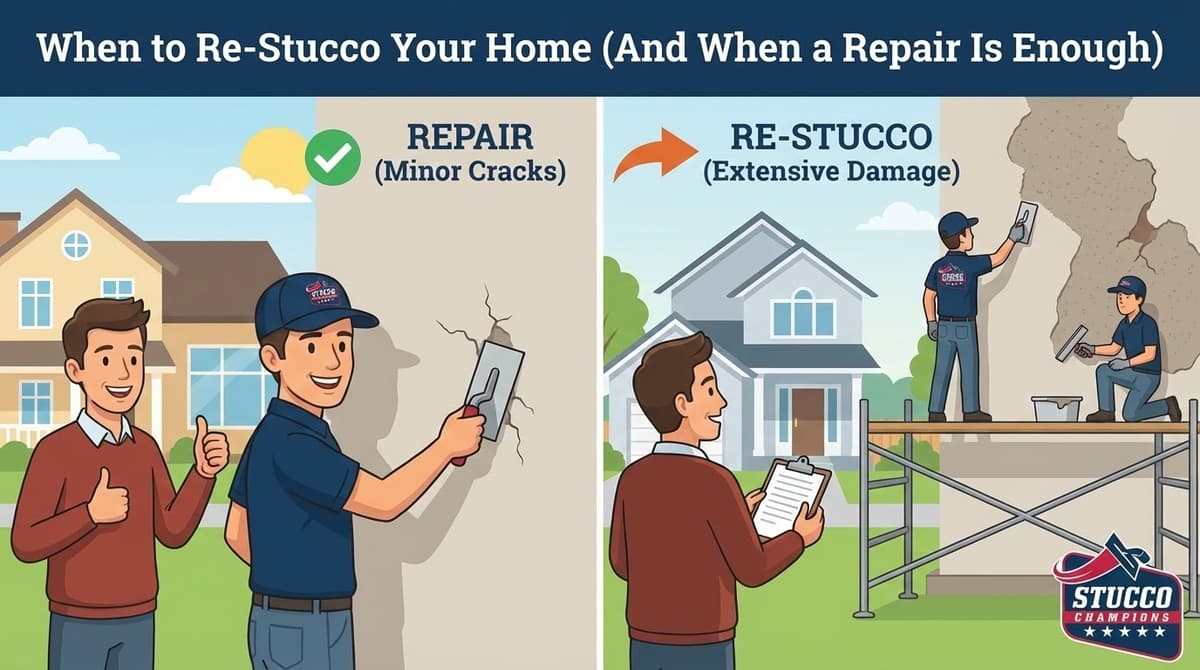
3. Phase 2: The Crack Defense System
Older homes have settled. They have stress cracks at the windows and doors. A simple color coat will not stop these cracks from returning.
A professional Re-Stucco includes a Base Coat & Mesh system:
1. We apply a layer of polymer-modified base coat (like Omega or LaHabra base).
2. We embed a layer of fiberglass mesh into the wet cement across the entire wall (not just over the cracks).
This creates a "floating skin" that resists thermal expansion and seismic movement, significantly reducing future cracking.
4. Phase 3: The Aesthetic Reset
Re-stuccoing allows you to change the physical profile of the house.
- Texture Change: We can take a rough, dated "20/30 Sand Finish" or "Spanish Lace" and skim it flat to create a modern "Santa Barbara Smooth" finish.
- Color Permanence: By using an Acrylic Finish, the new color is integrated into the material. It won't peel or chip like paint because the color goes all the way through the topcoat.
5. Comparison Matrix: Re-Stucco vs. Paint
What are you really buying?
| Feature | Re-Stucco | Exterior Paint |
|---|---|---|
| Color Longevity | ✅ Up to 20 years | ❌ 5–7 years |
| Peel Resistance | ✅ Integral bond (No peeling) | ❌ Prone to peeling/blistering |
| Texture Options | ✅ Fully customizable (Smooth/Lace) | ❌ None (Locks in old texture) |
| Waterproofing | ✅ High (Restores envelope) | ❌ Moderate (Can trap water) |
6. The ROI of Re-Stucco
While painting costs less upfront, it requires re-doing every 5-7 years. A proper Re-Stucco with acrylic finish can last 20-25 years with minimal maintenance. Furthermore, it covers the sins of the past—patchy repairs, conduit holes, and water stains—making the house look like new construction.
Related Resources
Last week, we shared Sand Finishes vs. Smooth Stucco: Differences Explained. Learn about the textures you can choose during your re-stucco.