How To Install A Hose Reel On A Stucco Wall: A Detailed Guide

Written by Stucco Champions — Southern California’s Authority on Exterior Plastering.
How to Install a Hose Reel on a Stucco Wall: A Detailed Tutorial
In Southern California, gardening is a year-round activity, making a sturdy hose reel essential. However, mounting heavy equipment to a stucco wall is risky. Stucco is a rigid cement shell; it is brittle and non-structural. If you attach a reel that holds 50lbs of water-filled hose using the wrong anchors, you risk cracking the facade or ripping the fixture right off the wall.
This guide explains the engineering behind anchoring to stucco, specifically focusing on how to prevent water intrusion at the drill points.
1. The Physics of Anchoring: Stud vs. Surface
Before you drill, you must understand what you are drilling into.
- Ideally: Find a Stud. The strongest installation is a lag bolt driven directly into a wood 2x4 stud. This transfers the weight to the frame, not the stucco.
- Reality: Stucco Anchors. Studs are hard to find behind 7/8" of cement. Most installations rely on anchors.
Do Not Use: Plastic drywall plugs. They will pull out.
Do Use: Lag Shields (for solid masonry) or Toggle Bolts (for hollow walls).
Free Assessment
Noticing Stucco Damage?
Get a free on-site assessment from a licensed contractor. $0 deposit, no obligation.
GET FREE ASSESSMENT2. Know Your System: 3-Coat vs. 1-Coat
Your wall type dictates your anchor choice.
System Identification
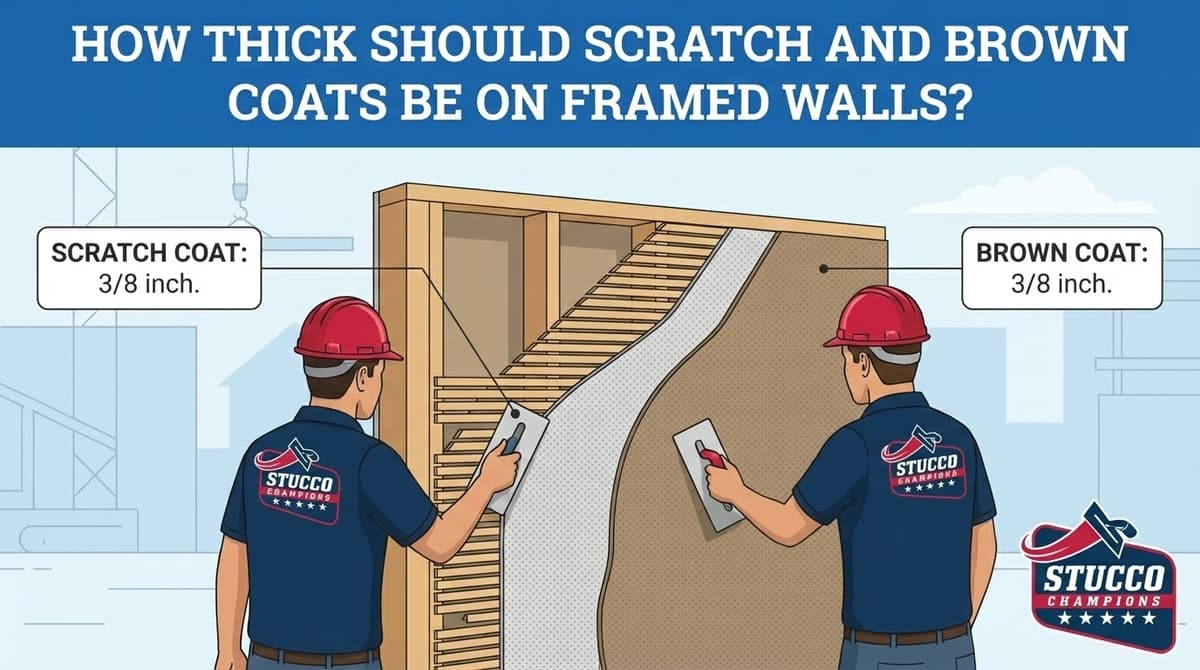
Traditional 3-Coat: Solid cement (7/8" thick). Use Lag Shields. The expansion of the shield bites into the solid masonry.
One-Coat (Foam): Thin cement (3/8") over 1 inch of foam. DANGER: You cannot use expansion anchors here; they will crush the foam. You MUST use Toggle Bolts (Snaptoggles) that grab the plywood sheathing behind the foam, or hit a stud.
3. The Installation Protocol
Step A: Tools & Prep
You need a Hammer Drill and a Carbide-Tipped Masonry Bit. A standard drill will burn out trying to get through Portland cement.
Tip: Use a bit size that matches the shank of your anchor exactly.
Step B: Marking & Drilling
1. Hold the reel at the desired height (usually 3-5 feet).
2. Mark holes with a sharpie.
3. Drill straight. Do not wiggle the drill. Wiggling "ovals" the hole, making the anchor loose.
4. Clean the Hole: This is critical. Blow out the concrete dust. Sealant will not stick to dust.
Step C: The Waterproof Seal
Every hole you drill is a puncture in your home's waterproofing paper. You must seal it.
⚠️ The Silicone Injection
Before inserting the anchor or screw, fill the drill hole with Polyurethane Sealant (like Sikaflex).
As you drive the screw in, the sealant will squeeze out, coating the threads and sealing the breach in the building paper. This prevents water from rotting the stud behind the reel.
Step D: Fastening
Drive the lag bolts or tighten the toggles.
Caution: Do not over-tighten. Stucco is brittle. If you crank the bolt too hard, you will crack the stucco around the mount. Hand-tighten the last few turns.
4. Maintenance: The "Wiggle" Check
Once a year, grab your hose reel and wiggle it. If it moves, the anchors are failing or the stucco is crumbling internally.
The Fix: Do not just tighten the screw (it won't hold). You must remove the reel, fill the holes with stucco patch, and re-mount it a few inches away.
Conclusion: Do It Once, Do It Right
Installing a hose reel seems simple, but it creates four potential leak points in your wall. By using the correct heavy-duty anchors and injecting sealant into the holes, you ensure the convenience of a hose reel doesn't come at the cost of dry rot repairs later.
Related Resources
Last week, we shared Understanding Dryvit Stucco. If your wall sounds hollow (foam), read this to understand the substrate you are drilling into.