Control Joints vs Expansion Joints in Stucco: Purpose, Repairs & Mistakes
Control Joints vs Expansion Joints in Stucco: Purpose, Repairs & Mistakes
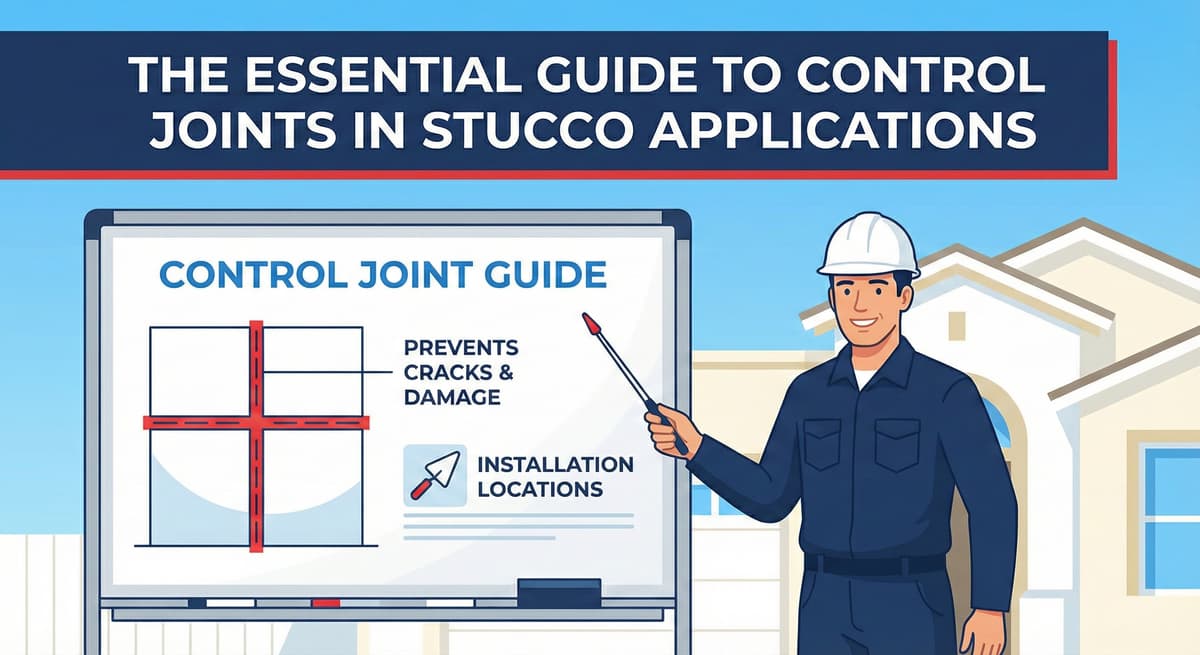
Stucco joints are often called control joints, expansion joints, movement joints, or expansion-control joints. The names are sometimes used loosely, but the practical purpose is the same: provide a planned location for movement so random cracking is less likely.
For homeowners, the important issue is not the label. It is whether the joint is in the right location, detailed correctly, weather-sealed where needed, and not bridged by continuous lath or plaster.
Free Assessment
Noticing Stucco Damage?
Get a free on-site assessment from a licensed contractor. $0 deposit, no obligation.
GET FREE ASSESSMENTWhat a Stucco Control Joint Does
A control joint divides a stucco field into smaller panels. Portland cement plaster shrinks as it dries and responds to temperature changes and building movement. Smaller panels handle these stresses better than one large uninterrupted panel.
Control joints reduce cracking risk, but they do not make stucco immune to cracks. Poor curing, bad lath laps, framing movement, water intrusion, and structural movement can still cause cracking.
What an Expansion or Movement Joint Does
An expansion or movement joint is used where more movement is expected, such as at dissimilar materials, building additions, floor lines, or where an existing construction joint must continue through the plaster. These joints often require a different accessory or back-to-back casing bead detail with a sealant joint.
The PCA manual describes control joint accessories and notes that manufacturer terminology can vary. It also describes two-piece slip-joint accessories that allow movement across the joint.
Quick Difference Table
| Joint Type | Main Purpose | Common Location |
|---|---|---|
| Control joint | Divide plaster into smaller stress-relief panels | Large wall fields, panel layout lines |
| Expansion/movement joint | Accommodate greater building or substrate movement | Dissimilar bases, building joints, additions, floor lines |
| Back-to-back casing bead joint | Create a sealant joint or architectural reveal | Movement joints, aesthetic reveals, special details |
The Most Important Installation Rule
The metal lath should not run continuously through a functioning control joint. If lath bridges the joint, the panels cannot move independently and the joint may not relieve stress as intended. The lath should stop at each side of the joint, attach properly, and remain compatible with the WRB and weather-sealing detail behind it.
Signs a Joint Was Installed Wrong
- Cracks forming next to a control joint instead of at the joint.
- Long, skinny stucco panels with no relief joints.
- Cracking at windows, doors, or dissimilar-material transitions.
- Joint terminations that allow water to enter.
- Sealant missing, split, hardened, or debonded in a movement joint.
- Stucco finish packed into the joint so it cannot move.
Repairing Stucco Joint Problems
Repair scope depends on the defect. A failed sealant joint may need removal, cleaning, backer rod, compatible sealant, and proper tooling. A joint bridged by plaster or lath may require opening the area and correcting the assembly. A random crack near a missing joint may need a broader layout decision, not only a surface patch.
Do not fill a movement joint with rigid cement patch. If the joint was intended to move, a rigid fill can force cracking somewhere else.
When Acrylic Finish Is Not a Substitute
Acrylic finish or base/mesh systems can reduce visible cracking in some applications, but they do not replace required joint layout or correct a failed movement detail. If the wall needs joints because of panel size, substrate changes, or building movement, the finish product alone is not the solution.
Bottom Line
Control joints manage stress within stucco panels. Expansion or movement joints handle larger building or substrate movement. For both, the joint only works if the lath, plaster, WRB, accessory, and sealant details are installed correctly. The label matters less than the function and detail.
Frequently Asked Questions About Stucco
How much does stucco repair cost in Orange County and Los Angeles?+
Stucco repair typically ranges from $500 for minor crack patching to $5,000+ for full re-stucco of a single elevation. The exact cost depends on the damage type (hairline cracks, water damage, delamination, weep screed failure), the square footage involved, and whether the original three-coat or one-coat stucco system needs to be matched. Stucco Champions provides fixed-price written estimates after a free on-site assessment — no hourly billing, no surprise change orders. See our stucco repair cost guide for detailed pricing by repair type.
How long does stucco last in Southern California?+
Properly installed three-coat stucco lasts 50-80+ years in Southern California's climate. The most common failure points aren't the stucco itself — they're the supporting components: corroded weep screed, deteriorated building paper behind the stucco, and improperly sealed window flashing. Most "stucco failures" are actually moisture-intrusion failures that start at one of these points. Annual visual inspection catches problems before they spread, which is why we offer free weep screed assessments for homeowners in our service area.
Can I repair stucco myself, or do I need a contractor?+
Hairline cracks under 1/8 inch wide can be sealed with elastomeric caulk by a homeowner. Anything larger — pattern cracks, delamination (where stucco pulls away from the wall), water-damaged areas, or chimney/window leak repairs — requires a licensed contractor. Improper DIY repair on these is the #1 cause of repeat failures because the underlying cause (usually moisture) isn't addressed. California's CSLB requires a license for any stucco work over $500. Looking for a highly-rated stucco contractor in Southern California? We are a CSLB-licensed and insured team ready to help.
How do I know if I need stucco repair vs. full re-stucco?+
If less than 30% of an elevation has visible damage, repair is the right call. If you see large areas of cracking, multiple zones of delamination, or the underlying paper and lath have rotted across an entire wall, full re-stucco of that elevation is more cost-effective long-term. Our free assessment includes a moisture survey and lath inspection so you get a defensible recommendation either way — not just a quote pushing whichever option costs more.
Do you offer warranties on stucco work?+
Yes. Stucco Champions provides a written 5-year workmanship warranty on all stucco repairs and a 10-year warranty on full re-stucco. We're a CSLB-licensed and insured contractor (license #1122006 — verifiable at cslb.ca.gov), which means our work is backed by California's contractor licensing board, not just our own promise. Request a free estimate to see the warranty terms in writing before you sign anything.
How long does a stucco repair take?+
Most patch repairs are completed in 1-2 days, including a 24-hour cure time before texture matching and color application. Full re-stucco of a single elevation runs 5-7 working days because each coat (scratch, brown, finish) needs to cure properly before the next is applied. We schedule around weather — California stucco needs daytime temperatures above 50°F with no rain forecast for at least 24 hours after each coat. Our crew shows up on time, every time.