Best Tips for Attaching Wood to Stucco Walls | Local Guide
By Stucco Champions··6 min read

Attaching Wood to Stucco Walls
When considering attaching wood to stucco walls, it's essential to ensure a secure and weather-tight connection. This guide will provide you with all the necessary information, including the strength requirements, stucco system considerations, methods of attachment, and tips for sealing the wood to the stucco wall. Whether mounting a decorative shelf or building a deck, this article will help you make informed decisions for a reliable attachment. Strength Requirements The first consideration when attaching wood to a stucco walls is determining the necessary strength for your specific project. Different situations demand varying levels of strength based on the weight or force applied to the wood. For instance, a lightweight decorative shelf requires less strength than a pergola support or a ledger board for a deck.- Identify load-bearing areas on the wall, such as wall studs or rim joists.
- Attaching wood to wall studs provides superior strength compared to attaching it between studs.
- It's crucial to locate and utilize load-bearing areas for fasteners and attachment points.
- Relying solely on stucco and shear behind wood attachments between studs may compromise strength.
 The type of stucco system on your walls plays a significant role in your attachment method. There are three common stucco systems to consider:
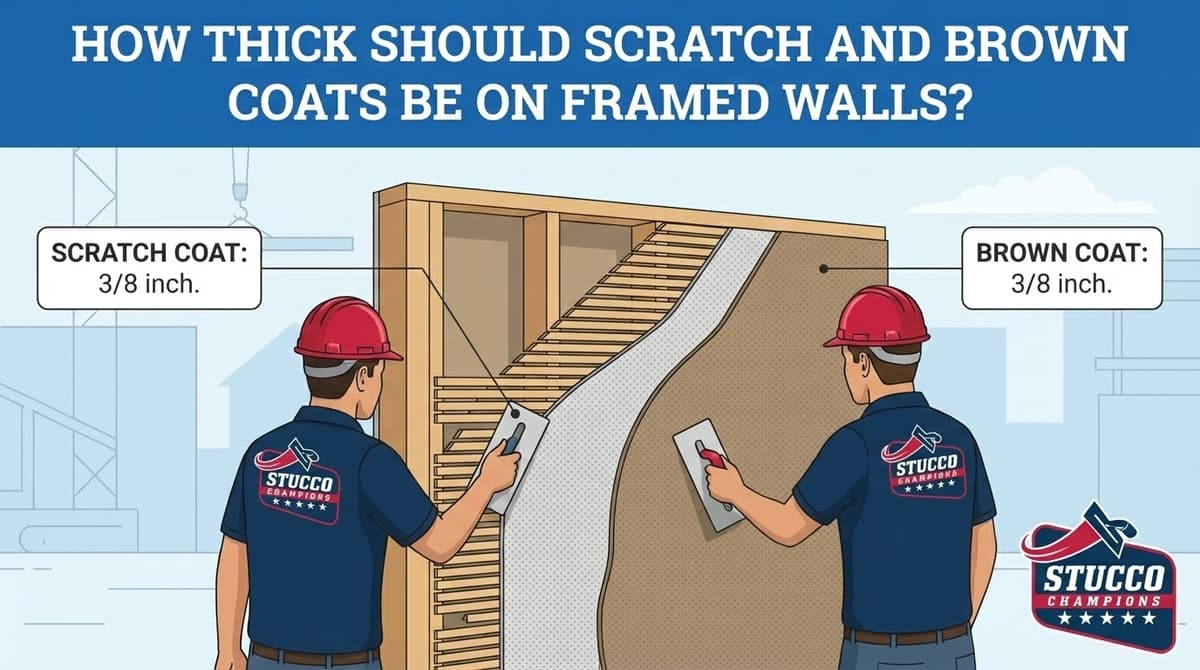
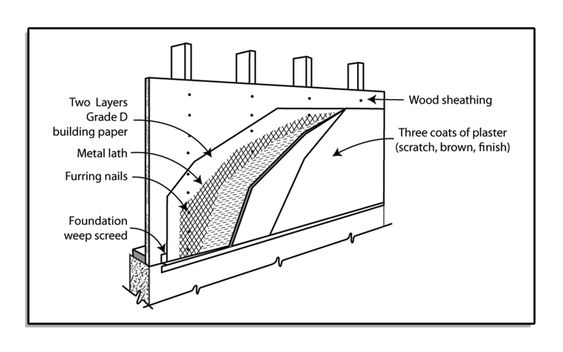
- Three Coat Stucco: This system is ideal for attaching wood due to its thickness, accommodating both stud-mounted and between-stud attachments. If your walls have plywood or OSB backing, they can handle even more weight. When using fasteners, ensure they are at least 2" long for open stud wall designs and a minimum of 2 1/2" for shear walls, plus the width of the wood.
- One Coat Stucco: If your walls have a one coat stucco system, it's best to mount light items where there's framing backing. Attaching to studs is a secure option, but keep in mind that the foam may compress when tightening fasteners, as it's relatively soft. Fasteners should be at least 2 1/2" for open stud walls and 3" for walls with shear, plus the width of the wood.
- EIFS Stucco: EIFS is similar to one coat stucco but less forgiving when it comes to penetrations. Attaching wooden items to EIFS walls can potentially lead to leaking issues, as it's designed to be less penetrable than other stucco systems.

 Methods of Attaching Wood to Stucco
Rule #1: Heavy Loads Need Studs
Stucco is a masonry "skin," not a structural support.
Heavy (Decks, Cabinets, Pergolas): You MUST anchor into the wood studs. Relying on stucco alone will cause the wood to rip off the wall.
Light (<15 lbs): Toggle bolts are acceptable for light items like mailboxes.
How to Find a Stud (Without Guessing)
Standard magnetic finders struggle with cement. Use these precise methods instead:
Map from the Inside: This is the most accurate method. Find the stud on the interior drywall using a reliable stud finder. Measure exactly how far that stud is from a window edge or door frame. Transfer that exact measurement to the exterior wall.
Inspect the Weep Screed: Look at the metal screed at the very bottom of the wall. Installers often nail this directly to the studs. If you see a pattern of nails (every 16" or 12"), follow that vertical line up.
Check Rafter Tails: On open-eave homes, the exposed rafter tails under the roof line often align directly with the wall studs below them.
Know Your Wall System
3-Coat (Traditional): Requires long fasteners. Formula: Wood thickness + 1" (Stucco) + 2.5" (Stud penetration).
1-Coat (Foam): Do not overtighten. You will crush the foam backing and crack the exterior.
EIFS (Synthetic): High risk. Requires "stand-off" sleeves to prevent crushing the system.
The 3 Approved Attachment Methods
Method A: Lagging (Heavy Duty)
Process: Drill a pilot hole into the stud → Inject silicone into the hole → Drive the lag bolt. The silicone creates a hidden seal around the threads.
Method B: Toggles (Light Duty)
Process: Use for hollow cavities (no stud). Avoid plastic plugs; they vibrate loose. Use metal toggle bolts instead.
Method C: Adhesive (Helper Only)
Process: Use construction adhesive to stop vibration/twisting, but never as the primary holder.
Waterproofing: The "U" Shape Rule
Fill the Hole: Always inject sealant into pilot holes before screwing.
Seal Top & Sides: Caulk the top and vertical sides of the wood.
Leave Bottom Open: Never caulk the bottom. If water gets behind the wood, it needs an escape route. Sealing the bottom creates a water trap that rots your wall.
Sealing the Wood to the Stucco Walls
After attaching the wood to the wall, it's essential to seal the perimeter to prevent water infiltration and allow for proper ventilation. Seal the top and sides of the wood, leaving the bottom open to enable trapped water to escape. This additional barrier, combined with caulking in pilot holes, helps protect the stucco and wood from water damage.
Regional Considerations and Troubleshooting
It's important to note that building codes and materials availability can vary regionally. Consider researching local regulations and consulting with professionals to ensure compliance with regional standards when attaching wood to stucco walls.
Additionally, this guide could benefit from a troubleshooting section, addressing common issues such as cracked stucco and how to rectify them, providing even more value to readers.
Conclusion
Attaching wood to stucco walls requires careful consideration of strength requirements, stucco system type, attachment methods, and sealing techniques. By following the guidelines in this comprehensive guide, you can confidently attach wood to stucco walls, creating secure and weather-resistant connections for your projects. Remember to adapt your approach based on your specific circumstances and consult local experts when needed for regional compliance and troubleshooting assistance.
Methods of Attaching Wood to Stucco
Rule #1: Heavy Loads Need Studs
Stucco is a masonry "skin," not a structural support.
Heavy (Decks, Cabinets, Pergolas): You MUST anchor into the wood studs. Relying on stucco alone will cause the wood to rip off the wall.
Light (<15 lbs): Toggle bolts are acceptable for light items like mailboxes.
How to Find a Stud (Without Guessing)
Standard magnetic finders struggle with cement. Use these precise methods instead:
Map from the Inside: This is the most accurate method. Find the stud on the interior drywall using a reliable stud finder. Measure exactly how far that stud is from a window edge or door frame. Transfer that exact measurement to the exterior wall.
Inspect the Weep Screed: Look at the metal screed at the very bottom of the wall. Installers often nail this directly to the studs. If you see a pattern of nails (every 16" or 12"), follow that vertical line up.
Check Rafter Tails: On open-eave homes, the exposed rafter tails under the roof line often align directly with the wall studs below them.
Know Your Wall System
3-Coat (Traditional): Requires long fasteners. Formula: Wood thickness + 1" (Stucco) + 2.5" (Stud penetration).
1-Coat (Foam): Do not overtighten. You will crush the foam backing and crack the exterior.
EIFS (Synthetic): High risk. Requires "stand-off" sleeves to prevent crushing the system.
The 3 Approved Attachment Methods
Method A: Lagging (Heavy Duty)
Process: Drill a pilot hole into the stud → Inject silicone into the hole → Drive the lag bolt. The silicone creates a hidden seal around the threads.
Method B: Toggles (Light Duty)
Process: Use for hollow cavities (no stud). Avoid plastic plugs; they vibrate loose. Use metal toggle bolts instead.
Method C: Adhesive (Helper Only)
Process: Use construction adhesive to stop vibration/twisting, but never as the primary holder.
Waterproofing: The "U" Shape Rule
Fill the Hole: Always inject sealant into pilot holes before screwing.
Seal Top & Sides: Caulk the top and vertical sides of the wood.
Leave Bottom Open: Never caulk the bottom. If water gets behind the wood, it needs an escape route. Sealing the bottom creates a water trap that rots your wall.
Sealing the Wood to the Stucco Walls
After attaching the wood to the wall, it's essential to seal the perimeter to prevent water infiltration and allow for proper ventilation. Seal the top and sides of the wood, leaving the bottom open to enable trapped water to escape. This additional barrier, combined with caulking in pilot holes, helps protect the stucco and wood from water damage.
Regional Considerations and Troubleshooting
It's important to note that building codes and materials availability can vary regionally. Consider researching local regulations and consulting with professionals to ensure compliance with regional standards when attaching wood to stucco walls.
Additionally, this guide could benefit from a troubleshooting section, addressing common issues such as cracked stucco and how to rectify them, providing even more value to readers.
Conclusion
Attaching wood to stucco walls requires careful consideration of strength requirements, stucco system type, attachment methods, and sealing techniques. By following the guidelines in this comprehensive guide, you can confidently attach wood to stucco walls, creating secure and weather-resistant connections for your projects. Remember to adapt your approach based on your specific circumstances and consult local experts when needed for regional compliance and troubleshooting assistance.
Attaching Wood to Stucco Walls