DIY Stucco Application Guide for Homeowners
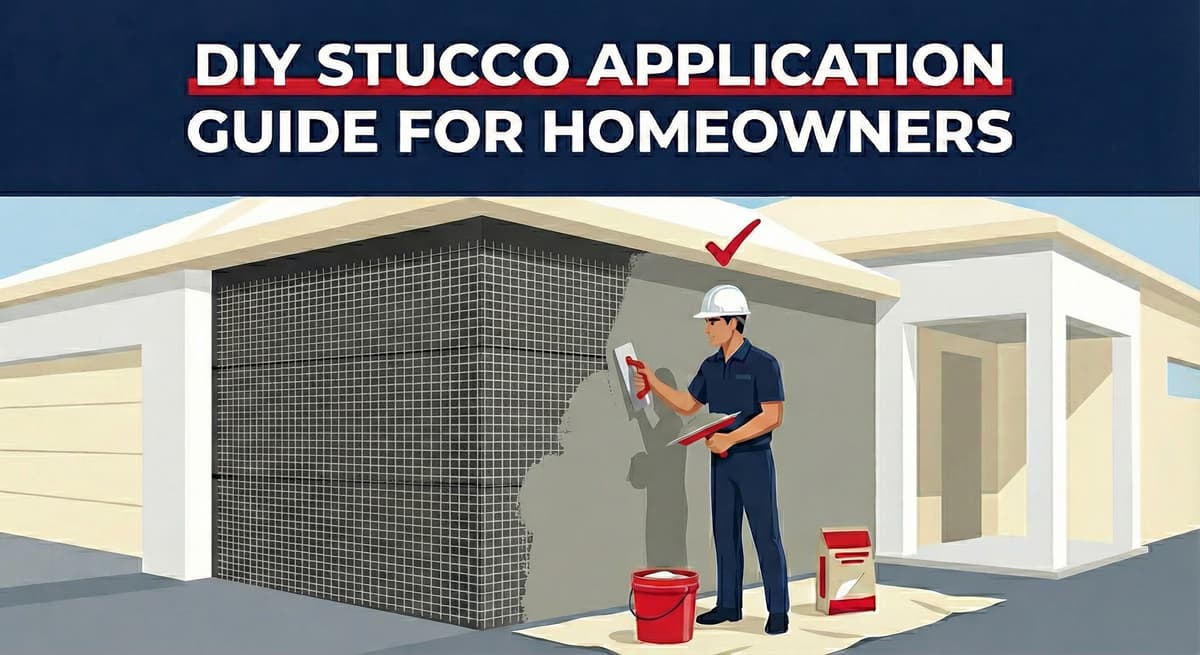
DIY Stucco Application: What Every Homeowner Should Know Before Starting
Tackling a stucco project on your own can be immensely rewarding, but it is also one of the most physically and technically demanding DIY tasks. Stucco isn't just "mud on a wall"; it is a multi-layered system that relies on precise chemistry, timing, and muscle memory.
If you are a hands-on homeowner planning a garden wall or a small patch repair, this guide breaks down the professional protocol for mixing and applying traditional three-coat stucco. We\u2019ll cover the tools you need, the steps to follow, and the critical mistakes that can turn a weekend project into a structural failure.
1. The "System" Approach: Tools & Materials
Before you mix your first batch, you need the right setup. Using the wrong tool (like a flat shovel instead of a hawk) will make the job impossible.
- Tools: Magnesium Hawk, Pool Trowel, Scarifier (Scratcher), Sponge Float, Masonry Hoe or Drill Mixer.
- Lath Materials: 2 Layers of Grade D Paper, 17-Gauge Wire Mesh, Galvanized Staples, Weep Screed.
- Cement: Plastic Cement (for Scratch/Brown) and Finish Coat Stucco.
Free Assessment
Noticing Stucco Damage?
Get a free on-site assessment from a licensed contractor. 0 deposit, no money upfront, progress payments only.
GET FREE ASSESSMENT2. Step 1: The Waterproof Foundation (Lath)
Do not skip this step. Stucco absorbs water. If you apply it directly to wood, the wood will rot.
- Paper: Install two layers of Grade D building paper, lapped "shingle fashion" (bottom to top).
- Weep Screed: Install the metal screed at the base of the wall, ensuring it is 4 inches above the soil.
- Wire Mesh: Staple galvanized wire lath over the paper. Ensure the wire is "furred out" (held slightly off the wall) so the cement can get behind it.
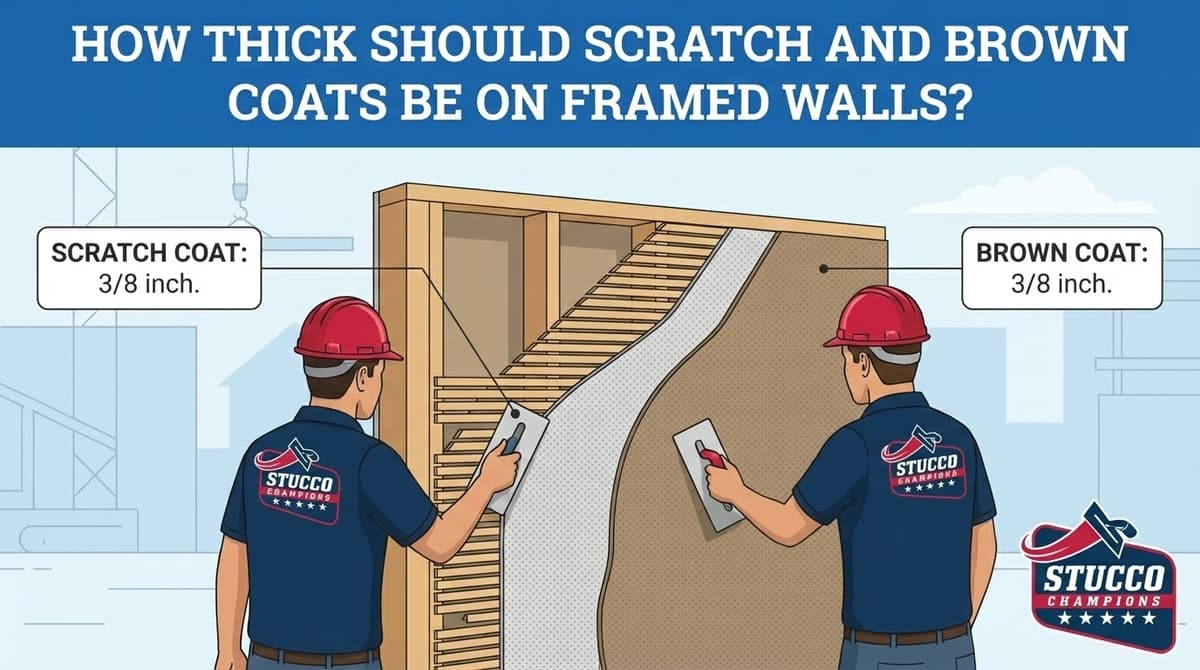
3. Step 2: The Scratch Coat (3/8")
This is the structural layer.
Application: Push the cement hard into the wire mesh. You want full embedment.
Texture: While the cement is wet, use a Scarifier to cut horizontal grooves across the entire surface. These grooves act like Velcro for the next layer.
Cure: Let it sit for 48 hours. Mist it with water to prevent cracking.
4. Step 3: The Brown Coat (3/8")
This is the leveling layer.
Application: Apply another layer of cement over the scratch coat to bring the wall to a total thickness of 3/4".
Technique: Use a "Rod" or straightedge to shave the wall flat. Then, use a float to create a uniform, sandy texture.
Cure: This needs to cure for 7 to 10 days. If you rush this, your finish coat will crack.
5. Step 4: The Finish Coat (1/8")
This is the beauty layer.
Application: Apply a thin layer of colored stucco.
Texturing: Use a sponge float for a "Sand Finish" or a trowel for a "Spanish Lace" look. Work in the shade if possible; if the finish dries too fast ("flash drying"), it will blotch and flake.
- Over-Watering: If the mix is "soupy," it will shrink and crack. Aim for a "stiff peanut butter" consistency.
- Ignoring Control Joints: Large walls need expansion joints to handle movement. Without them, the stucco will create its own cracks.
- Rushing the Cure: Stucco gains strength over time. If you paint it or seal it too soon (before 28 days), you will trap moisture and cause failure.
Conclusion: Know Your Limits
DIY stucco is feasible for garden walls, BBQs, and small patches. However, for a full house re-stucco or structural water damage repair, the risks are high. Uneven mixing, poor lathing, or improper waterproofing can devalue your home. If the project involves waterproofing a living space, we highly recommend consulting a licensed professional.
Last week, we shared How To Mix Stucco Base Coat. If you are mixing your own mud, get the recipe right.