
Stop Water Damage Before It Eats Your Walls. — Expert Stucco Repair in Orange County & Los Angeles
We find the hidden cause, fix it permanently, and you pay nothing until you’re 100% satisfied. Serving OC & LA.
in OC & LA
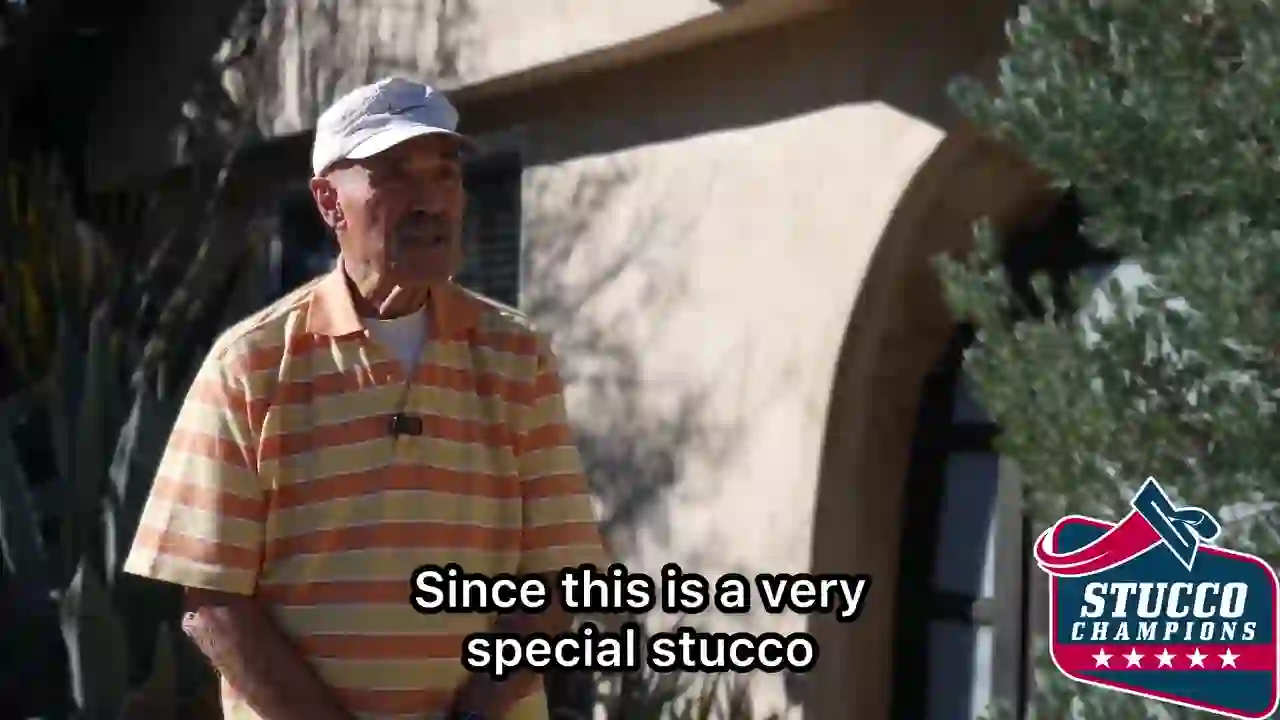
That “Small Crack” Is an Open Wound in Your Home.
Rain seeps in. Wood rots silently. Mold grows where you can’t see it. By the time a crack looks bad on the outside, the damage behind your walls is already 10x worse.
Most contractors slap on a patch and leave. Six months later, the crack is back — and the rot has spread. The only real fix is finding the root cause and rebuilding from the inside out.
Find Out How Bad It Really Is
Most damage is hidden behind the surface. Get a free assessment before it gets worse.
See What's Wrong — FreeHow It Works
3 Simple Steps to a Permanent Fix.
Free Walkthrough
Send us a photo or schedule a free onsite walkthrough. We assess the damage, identify the root cause, and document everything. no cost, no obligation.
Get Your Estimate
We send you a detailed, fixed-price estimate with a clear scope of work. No hidden fees, no surprises. You approve it on your terms. zero deposit required.
We Get It Done
Once scheduled, our crew shows up on time and completes the job right. fast, clean, and built to last. You only pay when you’re 100% satisfied.
What Homeowners Say
Trusted by 500+ Homeowners
Rated 5.0 by 47 homeowners — View on Google
“I had the pleasure of working with Stucco Champions for a stucco repair job on my home. I was thrilled with how the work came out. Not only was the work flawless, but it was within budget and it went as planned. I highly recommend Stucco Champions for their quality, timeliness, responsiveness & professionalism!”
“We got in contact with the Stucco Champions company after it rained we had water get into our garage and had no idea why. They found the problem right away. The weep screed at the bottom of our exterior stucco wall was damaged and needed replacing. They did the full weep screed installation and fixed the stucco damage around it. The texture blending was great and the finish matches perfectly. No more leaks since the repair.”
“We had some bad cracking on our exterior walls. The stucco contractor came out, assessed the stucco damage, and handled the stucco crack repair quickly. The texture blending was great and you honestly can't tell where the stucco patching was done. Really impressed with the quality of the stucco wall repair.”
“I had cracking and water damage on my stucco that I kept putting off. Called Stucco Champions and they came out quickly for a free estimate. The team was professional, explained exactly what stucco repair work was needed, and gave me a fair quote on the spot. The stucco contractors did excellent work and you honestly cannot tell where the damage was. The color match is perfect. They cleaned up after themselves and the whole experience was hassle free.”
“I couldn't be happier with the results of my recent stucco repairs. The crew were prompt, courteous, and respectful of our property. They did an excellent job and left everything clean and in place when the job was complete. I would definitely call on them again for future projects and recommend them highly.”
“The team at Stucco Champions recently completed work on my property, and I am very satisfied with the results. What stood out to me: the quality of the finish is consistent and matches the style of the house perfectly. They took the time to mask off my windows and doors, and the cleanup after the job was thorough. They kept me updated on the timeline and explained the steps they were taking to ensure proper waterproofing. I would highly recommend them to anyone looking for reliable stucco installation or repair.”
TRANSPARENT PRICING
Select Your Service to Get Started
Pick a service below and we’ll walk you through pricing, then schedule your free assessment. No deposit required.
Final price depends on scope and square footage. $0 deposit. You pay only when 100% satisfied.
WHY HOMEOWNERS CHOOSE US
What Makes Us Different
$0 Down, Pay When Satisfied
No deposits, no upfront costs. You only pay once you’re 100% happy with the finished result.
In-Depth Stucco Inspection
We thoroughly inspect your stucco before starting any work so we recommend the right fix for your situation.
CSLB Licensed & Insured
Fully licensed and insured. Your property is protected and the work is code-compliant.
Written Warranty Included
Every project comes with a written warranty. If something isn’t right, we come back and fix it — free.
Pay $0 Until You Are 100% Satisfied.
Schedule your free structural assessment. no obligation, no deposit.
Or for a quick response:
Text us at (657) 300-5675FAQ
Frequently Asked Questions
Everything you need to know about our stucco repair and re-stucco services in Orange County & Los Angeles
A patch covers one isolated spot — a single crack, chip, or hole. If you have damage in two or more areas of your home (different walls, corners, or elevations), that falls under multiple-area repair. During your free walkthrough we'll map every spot so nothing gets missed.
Yes. We custom-mix stucco on site to match your existing color and texture — sand, lace, dash, or skip-trowel. On properly executed repairs, the patch blends in and is virtually invisible once cured.
Most single patches are completed in one day. Multi-area repairs typically take 1–3 days depending on the number of spots and drying time between coats.
Recurring cracks usually mean the underlying cause wasn't addressed — settling, missing control joints, or substrate damage. We diagnose the root cause first so the repair sticks. If the damage is too widespread, we'll recommend a re-stucco of that section instead of throwing more patches at it.
No. If the existing substrate (lath, paper, framing) is in good shape, we can apply new stucco directly over the existing surface. A full tear-off is only necessary when the underlying structure is compromised — corroded lath, wood rot, or failed moisture barriers. We determine which approach your home needs during the free walkthrough.
A repair handles isolated damage. A re-stucco makes sense when:
- Cracking is widespread across multiple walls
- Stucco feels soft or spongy when pressed
- There are persistent moisture stains or bubbling
- You want to change your texture or color entirely
Most re-stucco projects take 1–3 weeks depending on home size, weather, and whether structural repairs are needed underneath. We provide a detailed schedule before work begins.
Absolutely. Partial re-stuccos are common — we can re-stucco specific walls or elevations and color-match them to the rest of your home. This is a great option when damage is concentrated on one side, like a south-facing wall with heavy sun exposure.
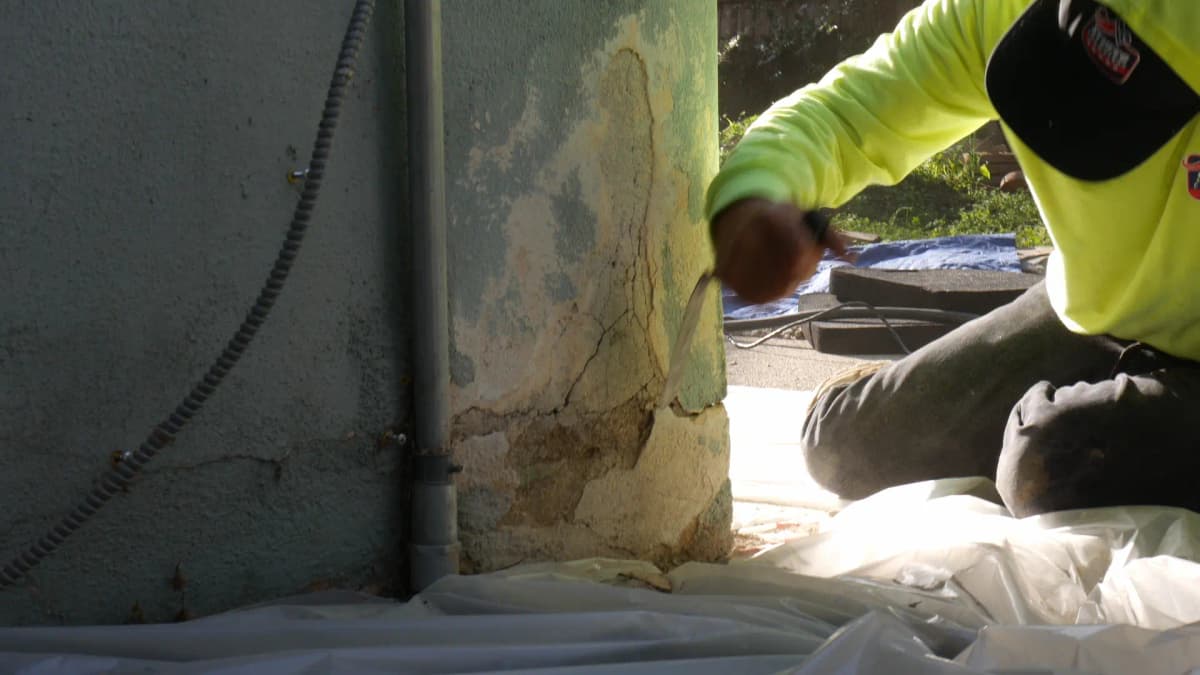
A weep screed is a metal flashing installed at the base of your stucco walls that lets trapped moisture drain out. It's required by California building code and prevents water from pooling behind the stucco, which causes wood rot, mold, and structural damage.
Look for these signs near the base of your walls:
- Stucco staining or discoloration at the bottom
- Bubbling or crumbling stucco near the foundation
- Visible rust streaks
- No visible metal edge at the stucco-to-foundation transition
We remove the stucco along the base of the wall (typically the bottom 12–18 inches), inspect the underlying framing for moisture damage, install new code-compliant weep screed, then re-stucco and match the texture and color. The rest of your wall stays untouched.
Yes. We can convert heavy dash, skip-trowel, or sand finishes to a clean, modern smooth finish. This involves re-stuccoing the sections being converted, since smooth stucco requires a specific application process to get a uniform result.
Smooth stucco demands a higher level of craftsmanship. Every imperfection shows on a flat surface, so it requires more coats, more precise trowel work, and longer finishing time. The material cost is similar — the difference is in the labor and skill required.
Not significantly. Smooth stucco is actually easier to clean — dirt and debris don't get trapped in texture grooves. It may show hairline cracks more readily than textured finishes, but with proper installation those are minimal.
Unlike most contractors who require 30–50% upfront, we don't ask for any deposit. We cover all materials and labor costs ourselves. You only pay after each phase of work is completed and approved.
The prices shown are starting prices. Your final price depends on square footage, the extent of any underlying damage, and your chosen finish. We provide a fixed-price written quote after your free walkthrough — no hidden fees, no surprises.
Yes. For re-stucco and smooth stucco projects, we offer financing options to help spread the cost. Contact us to discuss payment plans that work for your budget.
Yes. We provide free on-site walkthroughs with no obligation. A project manager visits your property, assesses the scope, and provides a detailed written quote with transparent pricing. No deposit or commitment required.
Our process is straightforward:
- 1. Free Walkthrough — We assess your property and discuss your needs
- 2. Written Quote — You receive a transparent, fixed-price proposal
- 3. Scheduling — We pick a start date that works for you
- 4. Execution — Our crew completes the work with quality checkpoints
- 5. Final Walkthrough — You inspect and approve before final payment
We typically start within 1–2 weeks of approval. For urgent repairs, we do our best to accommodate faster timelines.
Yes. Stucco Champions is licensed by the California Contractors State License Board (CSLB #1122006) and carries full general liability insurance and workers' compensation coverage.
We serve homeowners throughout Orange County and Los Angeles County — including cities like Newport Beach, Irvine, Anaheim, Long Beach, Pasadena, and everywhere in between.
Ready to Get Started?
Get your free, no-obligation estimate today. Remember – zero deposit required!
Book a Free Walkthrough